BONZZ'S PAGE OF ACHIEVEMENTS
CATEGORY: SHATTERING OF RO
Who murdered her... Druzzil Ro? Let us find out, go go go! -- Bonzz
 |
|
 |
|
--------------------------------------------------------------------
Search Bonzz's Site by typing a keyword(s) in the box below.


--------------------------------------------------------------------
ACHIEVEMENT CATEGORIES & QUICK LINKS
Achievements listed in the below sections are not necessarily listed in alphabetical order. They are generally listed in the order seen in the game (at the time they were added to the lists below). Use Control-F to "Find" a specific achievement you may be looking for.
All of the the below achievements should apply to all classes (they are not class specific).
| SUB-CATEGORY | ACHIEVEMENT COUNT | ACHIEVEMENT POINTS |
| General | 10 | 560 |
| Exploration | 6 | 60 |
| Special | 1 | 35 |
| Quests | 12 | 220 |
| Missions | 20 | 220 |
| Raids | 52 | 860 |
| Hunter | 9 | 270 |
| Collections | 33 | 450 |
| TOTALS | 132 | 2,675 |
EXPANSION INFORMATION EXPANSION INCLUSIONS PRE-RELEASE EVENT NEW STUFF
ACHIEVEMENTS ALTERNATIVE CURRENCY ARMOR SETS CHASE LOOT GAME CREDITS
LORE MERC GEAR ORNAMENTS SETS PROGRESSIVE ITEM RAID INFO & STRATS
SPECIAL ITEM(S) SPELLS, DISCIPLINES & SONGS STAT FOOD & DRINK TRADESKILL RECIPES ZONES LIST
PREVIOUS EXPANSION BACK TO MAIN ACHIEVEMENTS PAGE NEXT EXPANSION
--------------------------------------------------------------------
Shattering of Ro was the 32nd expansion of EverQuest, released December 2, 2025.
Players were pleased to see that the raid count was increased back up to the traditional nine (9) raids, but there were still only four (4) Group Missions (traditionally, there were eight (8) group missions). The Raid events were released (activated) in January 2026 (Tier 1), February 2026 (Tier 2) & March 2026 (Tier 3).
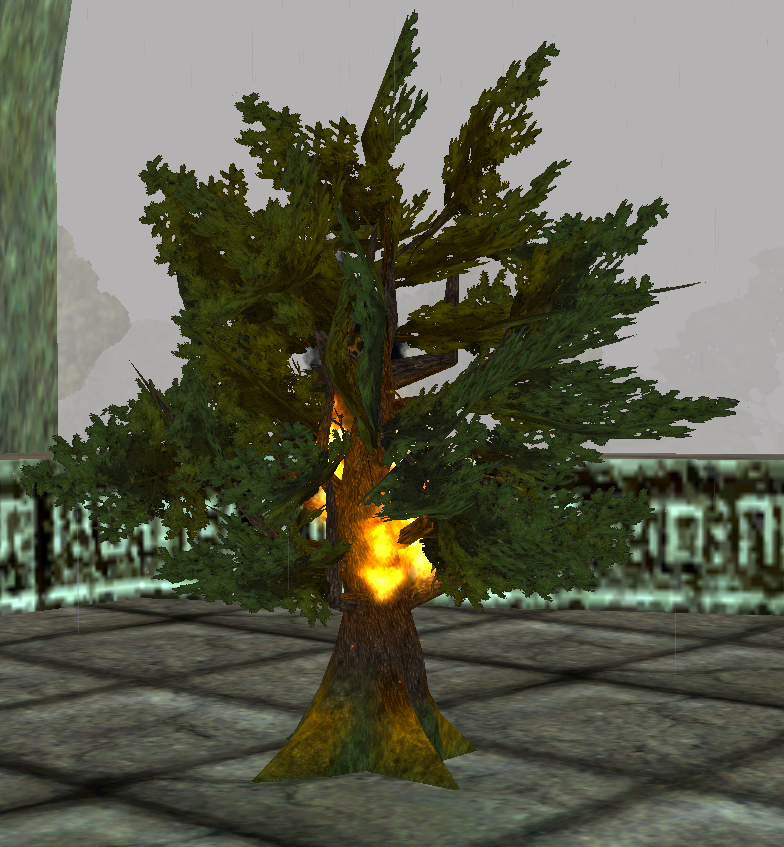
Other than via a portal / spell, access into this expansion is from The Wakening Lands (/waypoint 500, -1045, -20... a burning tree beside the entrance to the Plane of Growth). There is also a connection to Arcstone, Shattered Isles from West Freeport, but is locked by progression (Candlemaker's Workshop Mercenary & Partisan).
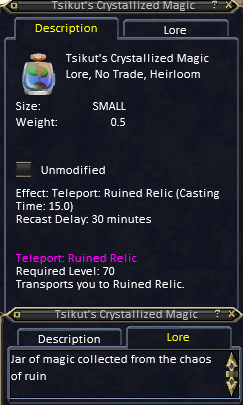
In the January 2026 Patch Tsikut's Crystallized Magic (a click portal to Ruined Relic) was added to the game, due popular demand. You can get it from Tsikut in Ruined Relic (key word 'traveled'), but only if you have the proper progression that would allow you to get to and speak to Tsikut.
--------------------------------------------------------------------
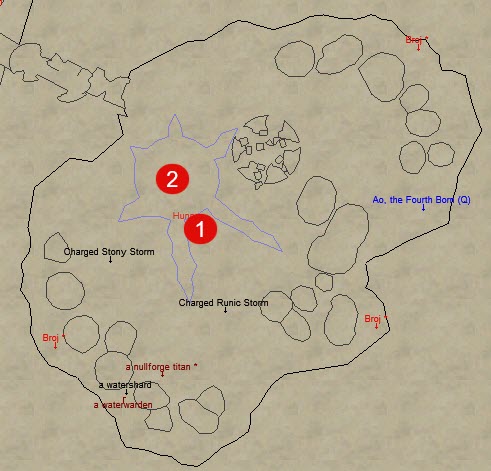
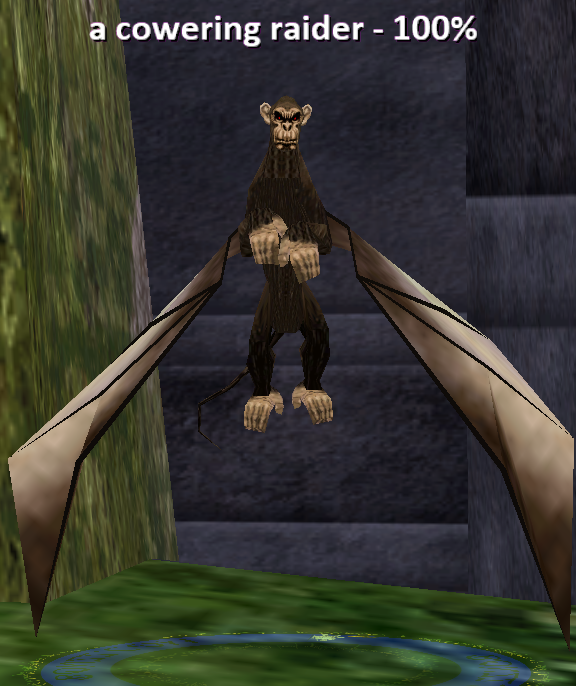
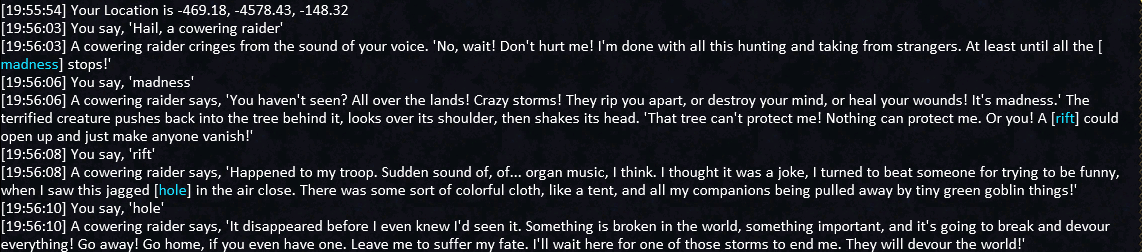
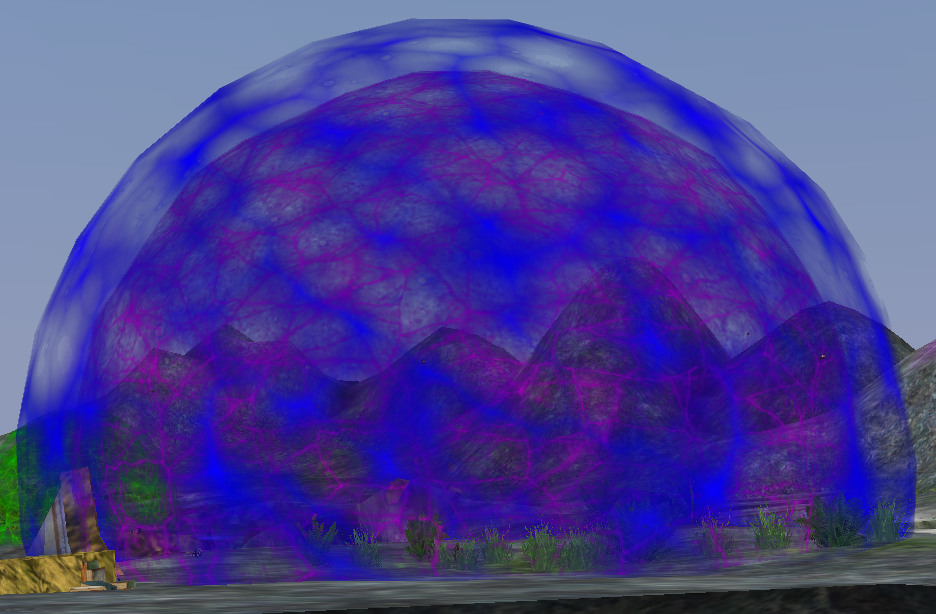
There was a Pre-Release Event in The Wakening Lands. There was an NPC (a cowering raider) who would talk to you about magical storms, but gave no task / quest. In the zone hidden among the many trees, there were four (4) variant 'Magical Storms.' If you stood in one, you would get a song window effect that was a short duration Air, Earth, Fire or Water illusion (depending on which Magical Storm you stood in). Hailing a cowering raider afterwards (with or without an illusion) resulted in the same chat spam. No reward (no achievement, no item, no tile, no XP.... nothing). It has been suggested that a more complete event was planned but was then delegated into 'just flavor' due time constraints. At least it directed Players to one of the gateways for this expansion (the Scarred Grove zone line is in The Wakening Lands) and 'previewed' the new 'magical storms.'
--------------------------------------------------------------------
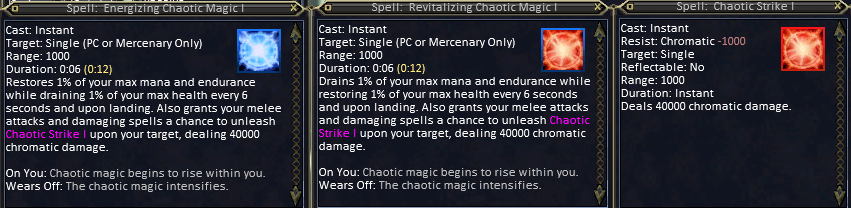
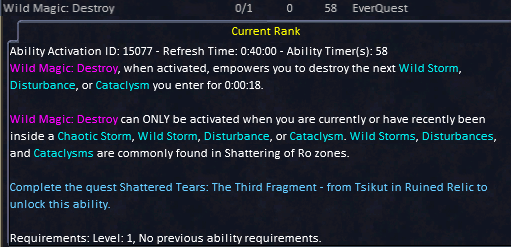

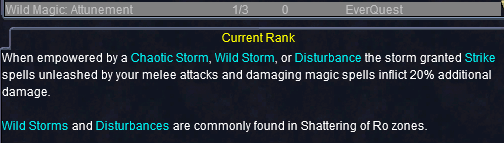
.png)
.png)
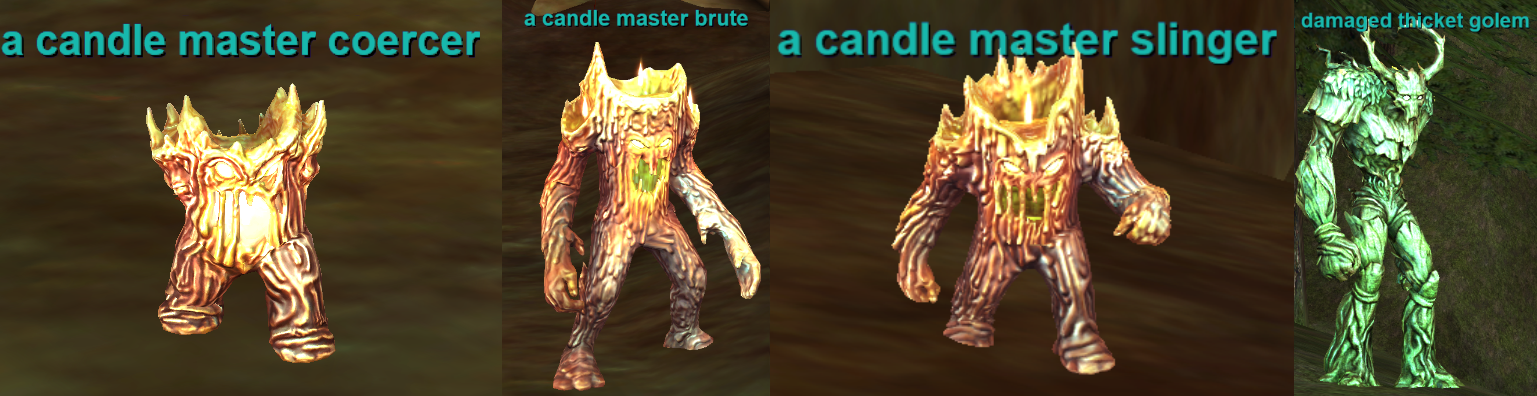





For more changes, modifications, fixes and additions that happened during this expansion, see here: EQ Timeline.
--------------------------------------------------------------------
The expansion was sold in four (4) versions: Family & Friends ($249.99); Premium ($139.99); Collector's ($89.99); and Standard ($34.99).
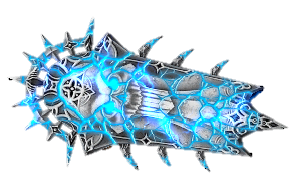
PRE-ORDER: If you Pre-Ordered (any version) you got (3) Shattered Longsword Ornament (convertible to 31 total ornament variations). You also got access to Beta, as a bonus.
STANDARD: This version did not include any Bonus Items.
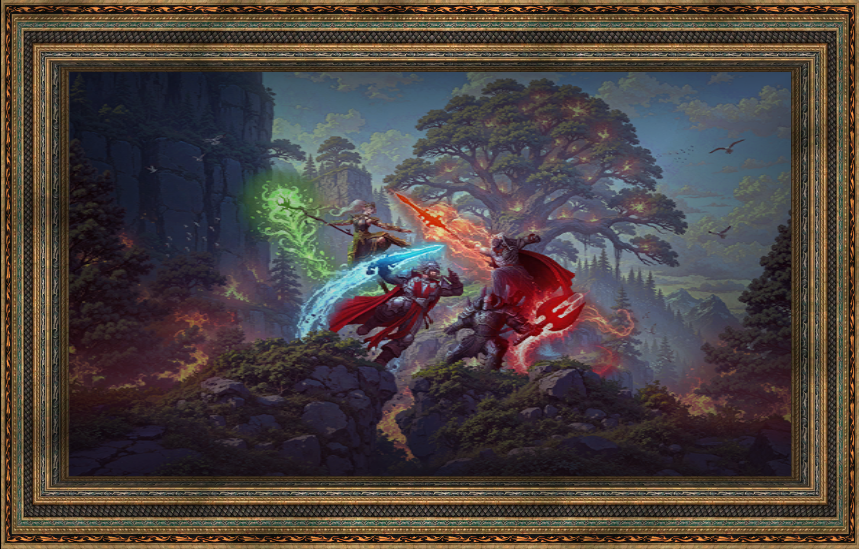
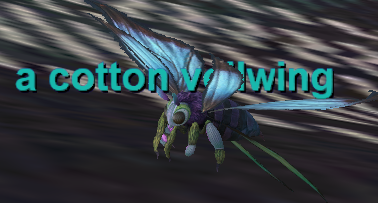
COLLECTOR'S: This version included: Contract of Candlefolk (Mercenary type); Tunare's Lily (Placeable Personal Portal); (2) Goblet of Shared Adventure (4-Hour +50% XP for your Group); Painting: Shattering of Ro (Placeable Painting); (2) Stormrider's Rucksack (42-Slot 100% Bag); Runed Strongbox (60-Slot Crate for your bank or your property); Spectral Horse Saddle (Mount); & Metamorph Wand - Cloth Butterfly (pet illusion / familiar).
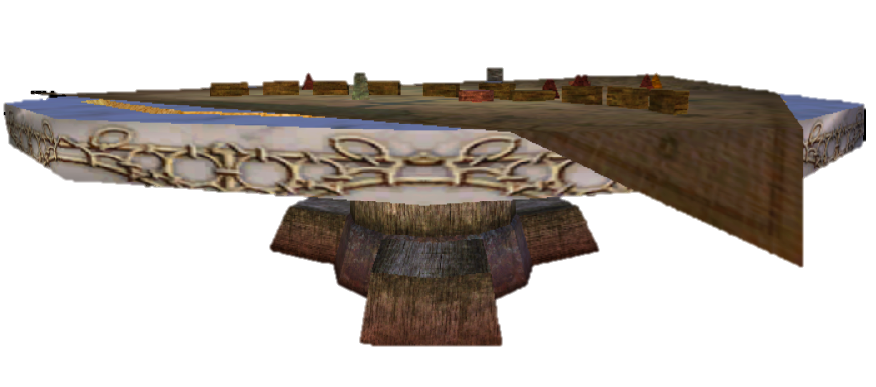
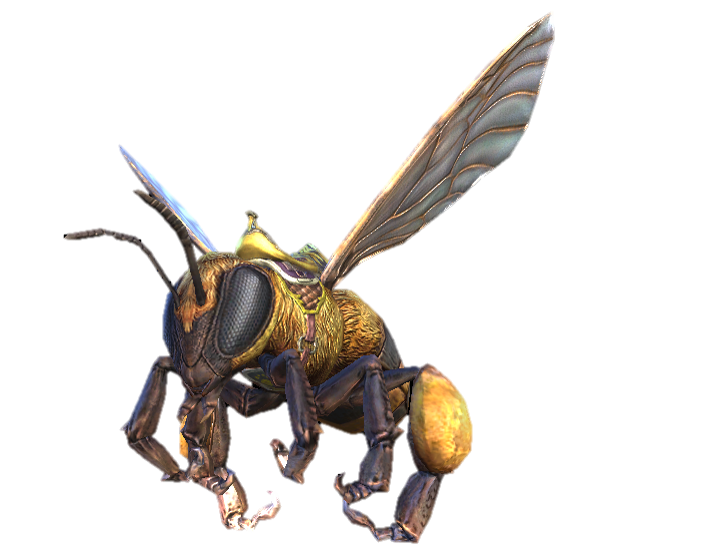
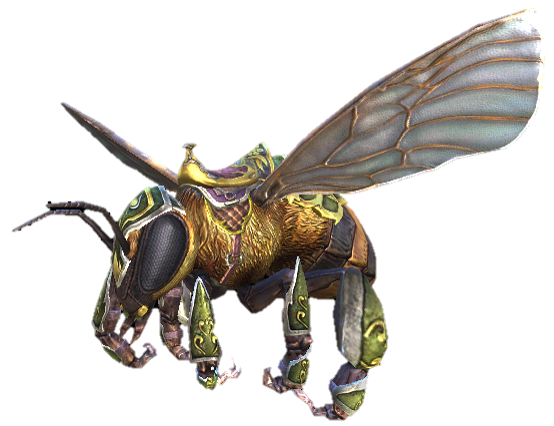
PREMIUM: This version included: Contract of Candlefolk (Mercenary type); Tunare's Lily (Placeable Personal Portal); Mithaniel Marr's Strategy Table (Placeable Guild Portal); (2) Goblet of Shared Adventure (4-Hour +50% XP for your Group); Painting: Shattering of Ro (Placeable Painting); (2) Stormrider's Rucksack (42-Slot 100% Bag); (2) Runed Strongbox (60-Slot Crate for your bank or your property); Spectral Horse Saddle (Mount); Metamorph Wand - Cloth Butterfly (pet illusion / familiar); (10) Perfected Augmentation Distiller; Giant Bee Saddle (Mount); Metamorph Wand: Magic Storm (pet illusion / familiar); & Visage of the Candlefolk (Illusion);
FAMILY & FRIENDS: This version included: Contract of Candlefolk (Mercenary type); Tunare's Lily (Placeable Personal Portal); Mithaniel Marr's Strategy Table (Placeable Guild Portal); (4) Goblet of Shared Adventure (4-Hour +50% XP for your Group); Painting: Shattering of Ro (Placeable Painting); (3) Stormrider's Rucksack (42-Slot 100% Bag); (2) Runed Strongbox (60-Slot Crate for your bank or your property); Spectral Horse Saddle (Mount); Metamorph Wand - Cloth Butterfly (pet illusion / familiar); (10) Perfected Augmentation Distiller; Metamorph Wand: Magic Storm (pet illusion / familiar); Giant Bee Saddle (Mount); Visage of the Candlefolk (Illusion); Tradable: Shattering of Ro (standard expansion); Tradable: Level 100 Heroic Character; Tradable: Spectral Horse Saddle (Mount); Tradable Giant Bee Saddle (Mount); Tradable: Runed Strongbox (60-Slot Crate for your bank or your property); Overseer Agent Pack (fifteen (15) Common Overseer Agents & two (2) Uncommon Overseer Agents); (5) Rodcet Nife Heritage Crate (Marketplace Item); and a Race Change Scroll (Marketplace Item).
BETA: Players who participated in Beta and earned enough 'Beta Tokens' were awarded a Metamorph Wand - Broom.
|
Metamorph Wand: Cloth Butterfly (Expansion Purchase Item) (Video) |
(Expansion Purchase Item) (Video) |
Mithaniel Marr's Strategy Table (Expansion Purchase Item) (Video) |
(Expansion Purchase Item) (Video) |
|
(Expansion Purchase Item) (Video) |
(Expansion Purchase Item) (Video) |
(Expansion Purchase Item) (Video) |
(Expansion Purchase Item) (Video) |
|
Contract of Candlefolk (Tank Option) (Expansion Purchase Item) (Video) |
Contract of Candlefolk (Caster DPS Option) (Expansion Purchase Item) (Video) |
Contract of Candlefolk (Melee DPS Option) (Expansion Purchase Item) (Video) |
Contract of Candlefolk (Healer Option) (Expansion Purchase Item) (Video) |
|
(Pre-Order Bonus) (Video) |
(Pre-Order Bonus) (Video) |
(Pre-Order Bonus) (Video) |
Shattered Tower Shield Ornament (Pre-Order Bonus) (Video) |
|
(Pre-Order Bonus) (Video) |
(Pre-Order Bonus) (Video) |
Shattered Arcane Staff Ornament (Pre-Order Bonus) (Video) |
(Pre-Order Bonus) (Video) |
|
(Pre-Order Bonus) (Video) |
(Pre-Order Bonus) (Video) |
(Pre-Order Bonus) (Video) |
(Pre-Order Bonus) (Video) |
|
Shattered Lucern Hammer Ornament (Pre-Order Bonus) (Video) |
(Pre-Order Bonus) (Video) |
Shattered Injection Dagger Ornament (Pre-Order Bonus) (Video) |
(Pre-Order Bonus) (Video) |
|
Shattered Spiked Mace Ornament (Pre-Order Bonus) (Video) |
Shattered Short Spear Ornament (Pre-Order Bonus) (Video) |
(Pre-Order Bonus) (Video) |
(Pre-Order Bonus) (Video) |
|
Shattered Ritual Spear Ornament (Pre-Order Bonus) (Video) |
Shattered Flanged Mace Ornament (Pre-Order Bonus) (Video) |
(Pre-Order Bonus) (Video) |
(Pre-Order Bonus) (Video) |
|
(Pre-Order Bonus) (Video) |
(Pre-Order Bonus) (Video) |
(Pre-Order Bonus) (Video) |
(Pre-Order Bonus) (Video) |
|
(Pre-Order Bonus) (Video) |
(Pre-Order Bonus) (Video) |
(Pre-Order Bonus) (Video) |
|
|
(Chain Video) (Cloth Video) (Robe Video) Fractured Arcane Ornament Sets (Group Ornaments) |
x x x x Chain (Video) Cloth (Video) Leather (Video) Plate (Video) Robe (Video) (Group Vendor Sold Ornaments) |
Chain (Video) Cloth (Video) Leather (Video) Plate (Video) Robe (Video) (Raid Ornaments) |
(Achievement) (Video) |
|
(Achievement) (Video) |
|
|
(Achievement) (Video) |
--------------------------------------------------------------------
--------------------------------------------------------------------
There were new recipes for every skill.
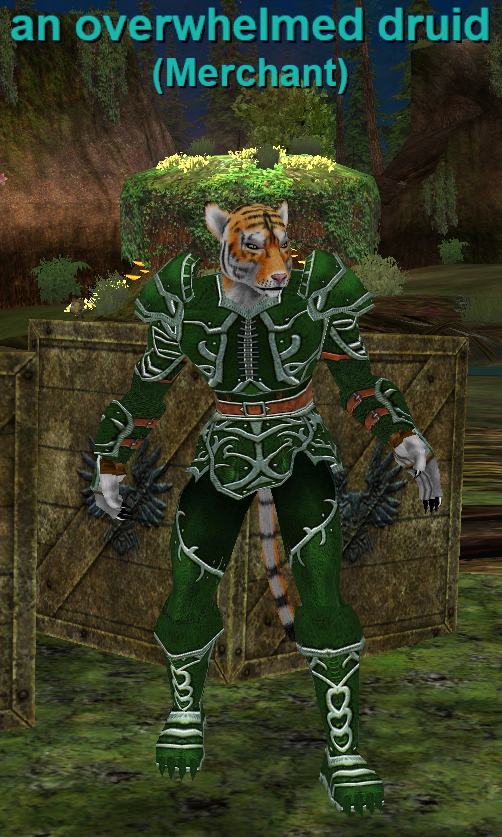
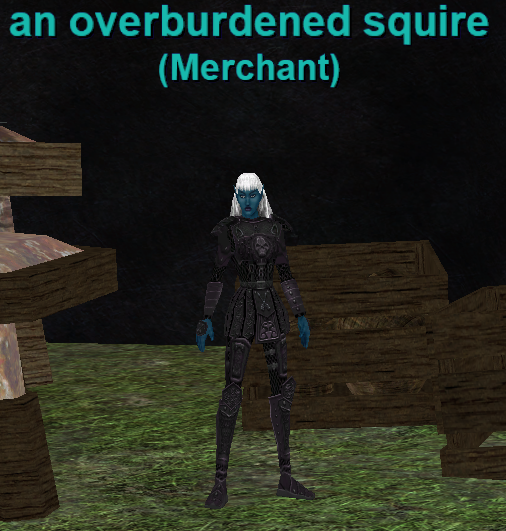
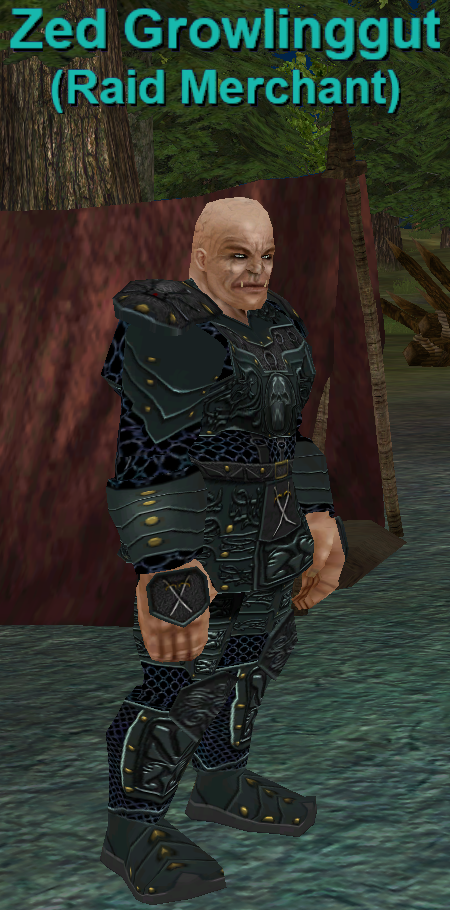
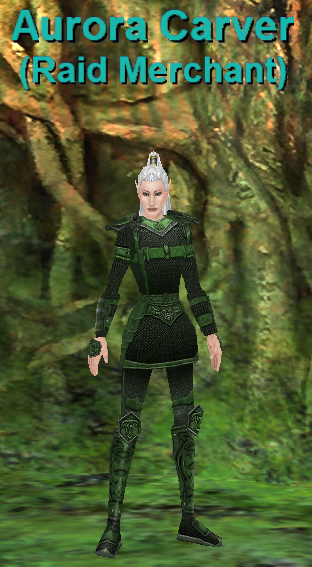
The recipe books, along with certain new and old tradeskill items, are sold by an overwhelmed druid and an overburdened squire in Scarred Grove (both are on Find).
--------------------------------------------------------------------
This expansions Player crafted stat food and stat drink is Uncanny Lemon-Iced Spiced Apple Cake & Uncanny Ambrosial Cocktail.

--------------------------------------------------------------------
--------------------------------------------------------------------
--------------------------------------------------------------------
Depending on which gear set you are making, they can require one (1) or more other items that are either dropped, crafted or sold by vendors.
These items are combined inside a combine container (which is also dropped or crafted) to make the actual armor.
As a note, weapons and non-visible items can also be crafted in similar fashion (as noted below).
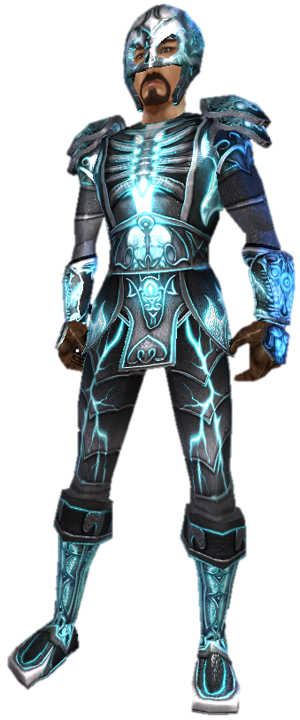
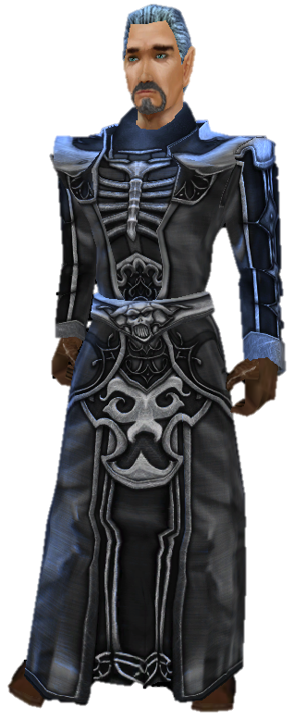
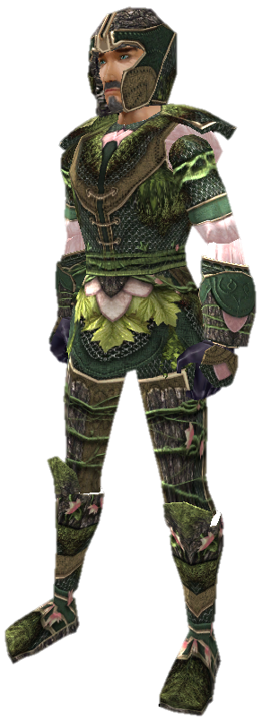
The armor sets and the materials needed are:
--------------------------------------------------------------------
The Unbroken Mask of the Vortex is a progressive Face item, attached to Experience, Quests, Missions, Raids & Achievements.
You craft / acquire the first version via a quest.
The quest series is outlined here.
--------------------------------------------------------------------
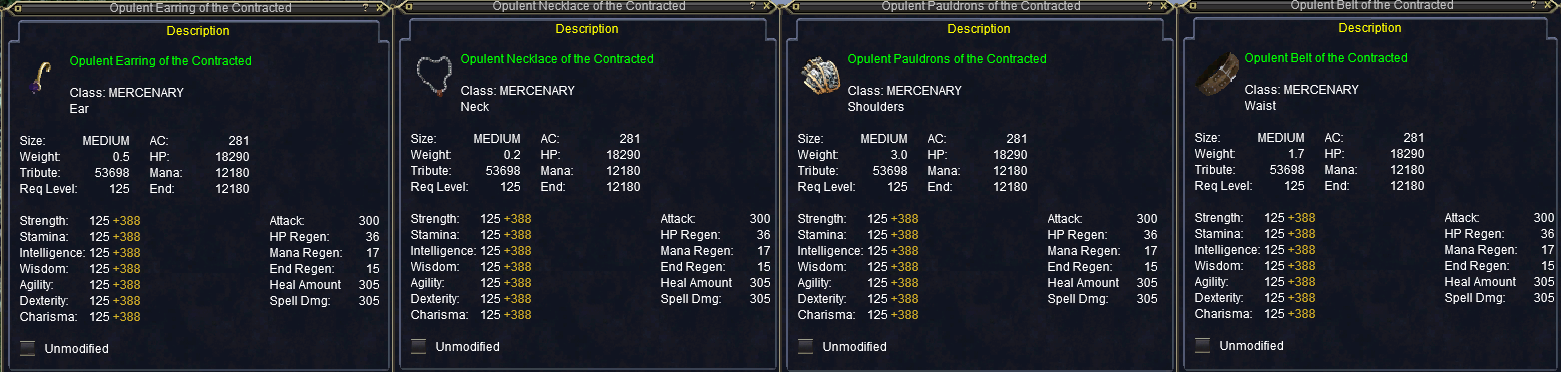
There is new Level 125-Required 'Opulent' Mercenary Gear.
It is a semi-rare drop from most any MoB in any zone.
--------------------------------------------------------------------
New 'Unbound Radiance' Chase loot (aka Rare Loot aka Ultra Rare loot) was added to the game.
|
Adroit Amice of Unbound Radiance Adroit Belt of Unbound Radiance Adroit Cloak of Unbound Radiance Adroit Earring of Unbound Radiance Adroit Idol of Unbound Radiance Adroit Mask of Unbound Radiance Adroit Necklace of Unbound Radiance Adroit Ring of Unbound Radiance Arcane Staff of Unbound Radiance Athame of Unbound Radiance Axe of Unbound Radiance Baton of Unbound Radiance Bow of Unbound Radiance Brilliant Amice of Unbound Radiance Brilliant Belt of Unbound Radiance Brilliant Charm of Unbound Radiance Brilliant Cloak of Unbound Radiance Brilliant Earring of Unbound Radiance |
Brilliant Idol of Unbound Radiance Brilliant Mask of Unbound Radiance Brilliant Ring of Unbound Radiance Broadsword of Unbound Radiance Censer of Unbound Radiance Compound Bow of Unbound Radiance Fighting Staff of Unbound Radiance Flanged Mace of Unbound Radiance Foil of Unbound Radiance Great Axe of Unbound Radiance Great Mace of Unbound Radiance Greatsword of Unbound Radiance Guardian's Mask of Unbound Radiance Halberd of Unbound Radiance Hammer of Unbound Radiance Katar of Unbound Radiance Kite Shield of Unbound Radiance Knife of Unbound Radiance Mace of Unbound Radiance |
Adroit Charm of Unbound Radiance Secure Cloak of Unbound Radiance Secure Necklace of Unbound Radiance Short Spear of Unbound Radiance Spear of Unbound Radiance Spiked Shield of Unbound Radiance Summoner's Earring of Unbound Radiance Sword of Unbound Radiance Tower Shield of Unbound Radiance Vigorous Amice of Unbound Radiance Vigorous Belt of Unbound Radiance Vigorous Charm of Unbound Radiance Vigorous Earring of Unbound Radiance Vigorous Idol of Unbound Radiance Vigorous Necklace of Unbound Radiance Vigorous Ring of Unbound Radiance Wand of Unbound Radiance War Sword of Unbound Radiance |
--------------------------------------------------------------------
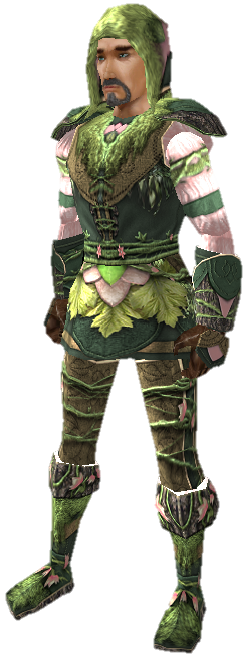
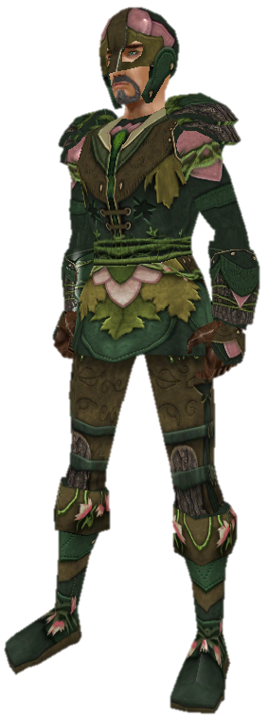
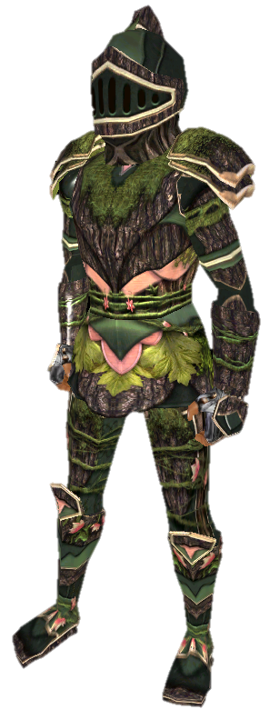
The Hero's Forge Ornament sets for this expansion were:
-------------------------------------------------------------------
The starting zone (Scarred Grove) can be accessed via The Wakening Lands (a tree on top of the center building by the Plane of Growth portal); or via a click portal that came with the some of the expansion packages; or via the Guild Hall Portal.
|
Arcstone Shattered Isles (Entrance from Candlemaker's Workshop is blocked until you complete Partisan of Candlemaker's Workshop and / or Mercenary of Candlemaker's Workshop ). Candlemaker's Workshop Labyrinth of Spite |
Ruined Relic Scarred Grove The Vortex |
BACK TO TOP OF CATEGORY BACK TO TOP OF PAGE
--------------------------------------------------------------------
NOTE: Any rewards highlighted in YELLOW might be worth pursuing, due the fun factor, benefit or usefulness of the reward (you decide).
NOTE: Some miscellaneous “hints” may also be included in PURPLE. These hints are intended to enhance / clarify the "how to" for accomplishing the achievement.
NOTE: Anything in RED text is either an informational or data / details that are not fully verified. If you can verify or provide correct information, please do (see end of page)!
NOTE: Items noted as a "REWARD" are items granted from the achievement, itself. Items listed as "ACQUIRED" are unique item's that can be / are / should be acquired along the way, towards completing the related achievement, but are not actually a reward granted from the achievement itself. In fact, the achievement may even be for acquiring said item. Additionally, only the more 'unique' Achievement awards are noted below... 'common' or 'generic' Achievement Rewards like Alternate Advancement points, Character Experience & Coin, are not noted in the reward options below.
|
NAME |
POINTS | NOTES | REWARD(S) |
|
Master of Shattering of Ro 020626 |
100 | Complete the two (2) listed Achievements. | N / A |
|
Arcane Arbiter 122025 |
60 | Complete the two (2) listed Achievements. |
Mount: Armored Bee Harness (see above) Titles: 'Arcane Arbiter' & 'The Arcane Arbiter' Suffices: 'Arcane Arbiter' & 'the Arcane Arbiter' |
|
Stormslayer 020626 |
60 | Complete the three (3) listed Achievements. |
Stormslayer's Chest (52-Slot 100% Bag) Titles: 'Stormslayer' & 'The Stormslayer' Suffices: 'Stormslayer' & 'the Stormslayer' |
|
Explorer of Shattering of Ro 120725 |
20 | Complete the six (6) listed Achievements. |
If you don't have one all ready, you should get a Journeyman's Compass. Click the Journeyman's Compass to gain another level of the Journeyman's Speed Alternative Advancement (if it isn't all ready maxed out). |
|
Champion of Shattering of Ro 121425 |
40 |
Complete the twelve (12) listed Achievements (Mercenary & Partisan tasks for each zone.) |
N / A |
|
Paragon of Shattering of Ro 122025 |
40 | Complete the four (4) listed Achievements. | |
|
Challenger of Shattering of Ro 021526 |
60 | Complete the four (4) listed Achievements. | Unlocks the ability to convert the Windstone of Virtue, Fretful Picker, Honed Gem of Unraveling Order and the Sharpened Gem of Unraveling Order. |
|
Conqueror of Shattering of Ro 081026 |
60 | Complete the nine (9) listed Achievements. | N / A |
|
Vanquisher of Shattering of Ro xxxxxx |
80 | Complete the nine (9) listed Achievements. | Arcane Tome (+180 Overcaps Aug). |
|
Storm Chaser xxxxxx |
40 | Complete the three (3) listed Achievements. |
Brazier of Magic (Trophy) (see above) Storm Chaser's Backpack (48-Slot 100% Bag) Title Prefix, 'Storm Chaser' and Title Suffix 'Storm Chaser.' |
BACK TO TOP OF CATEGORY BACK TO TOP OF PAGE
--------------------------------------------------------------------
|
NAME |
POINTS | NOTES |
|
Scarred Grove Traveler 120225 |
10 | Go to the noted zone. |
|
Candlemaker's Workshop Traveler 120225 |
10 | Go to the noted zone. |
|
Arcstone, Shattered Isles Traveler 120325 |
10 | Go to the noted zone. |
|
Ruined Relic Traveler 120325 |
10 | Go to the noted zone. |
|
The Vortex Traveler 120625 |
10 | Go to the noted zone. |
|
Labyrinth of Spite Traveler 120725 |
10 | Go to the noted zone. |
BACK TO TOP OF CATEGORY BACK TO TOP OF PAGE
--------------------------------------------------------------------
|
NAME |
POINTS | NOTES | REWARD(S) |
|
Artisan of Shattering Ro xxxxxx |
35 | Complete the seven (7) part quest series from Apprentice Mage Sarcrynn in Arcstone, Shattered Isles. |
Acquired: Unbroken Mask of the Vortex. The quest series is outlined here. |
BACK TO TOP OF CATEGORY BACK TO TOP OF PAGE
--------------------------------------------------------------------
|
NAME |
POINTS | NOTES |
|
Mercenary of Scarred Grove 120225 |
30 | Complete the six (6) listed tasks / quests. |
|
Partisan of Scarred Grove 120225 |
25 | Complete the five (5) listed tasks / quests. |
|
Mercenary of Candlemaker's Workshop 120225 |
15 | Complete the three (3) listed tasks / quests. |
|
Partisan of Candlemaker's Workshop 120325 |
15 | Complete the three (3) listed tasks / quests. |
|
Mercenary of Arcstone, Shattered Isles 120525 |
15 | Complete the three (3) listed tasks / quests. |
|
Partisan of Arcstone, Shattered Isles 120525 |
15 | Complete the three (3) listed tasks / quests. |
|
Mercenary of Ruined Relic 120625 |
20 | Complete the four (4) listed tasks / quests. |
|
Partisan of Ruined Relic 120625 |
15 | Complete the three (3) listed tasks / quests. |
|
Mercenary of The Vortex 120625 |
15 | Complete the three (3) listed tasks / quests. |
|
Partisan of The Vortex 120725 |
15 | Complete the three (3) listed tasks / quests. |
|
Mercenary of Labyrinth of Spite 121425 |
20 | Complete the four (4) listed tasks / quests. |
|
Partisan of Labyrinth of Spite 121425 |
20 | Complete the four (4) listed tasks / quests. |
BACK TO TOP OF CATEGORY BACK TO TOP OF PAGE
--------------------------------------------------------------------
All of the Mission Achievements, that do not credit until the Chest is opened, can be acquired via a Task Add. Task Added Players will get credit when the mission chest is opened. They will get credit no matter where they are. They do not have to be in zone.
|
NAME |
POINTS | NOTES | REWARD(S) |
|
Hero of Candlemaker's Workshop From Defense Unit CDL in Candlemaker's Workshop, keyword 'Accept.' 121625 |
10 |
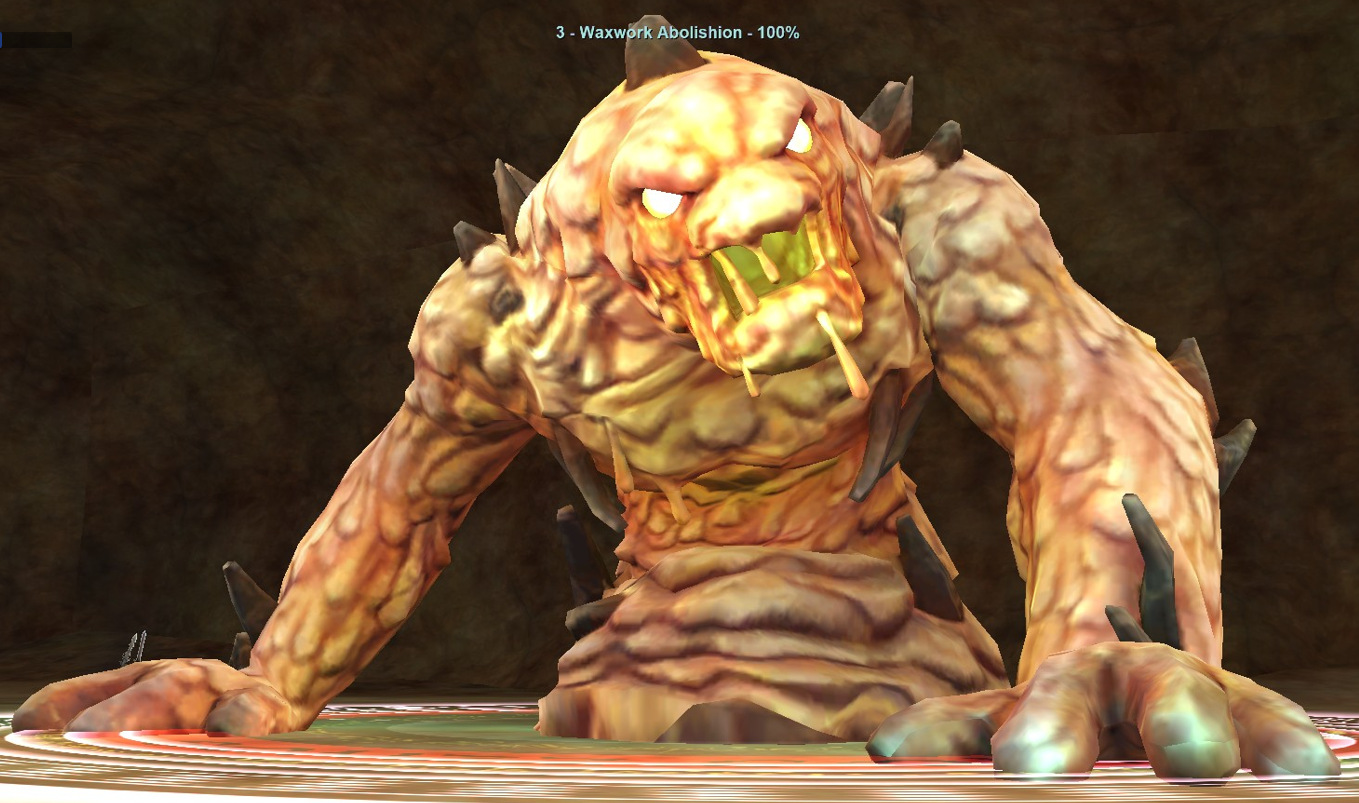
Complete the listed Mission. Base Strategy: Say ready to Defense Unit CDL to zone into the instance. Start the event by hailing and saying 'Destroy to Waxwork Abolishion. Every 20% Waxwork Abolishion will split into adds. Have the tank gather the adds together and face them away from the rest of the group. Kill one (1) of the adds and Waxwork Abolishion will reform after 15-seconds have passed (the rest of the split adds go poof). Repeat until Waxwork Abolishion is defeated. Defeated adds give their ability, to Waxwork Abolishion for the rest of the event (Waxwork Igniter = Directional DD; Waxwork Lancer = Directional DD; Waxwork Combuster = DoT; Waxwork Trapper = DoT / Slow; & Waxwork Burster = PB AoE. |
+1 Hero's Fortitude AA +1 Hero's Vitality AA |
|
Savior of Candlemaker's Workshop: Waxwork Abolishion 010826 |
15 | Complete the three (3) listed Achievements. |
+1 Hero's Fortitude AA +1 Hero's Resolution AA +1 Hero's Vitality AA |
|
Waxwork Abolishion: Wax Removal 121625 |
10 |
Kill all adds before the killing Waxwork Abolishion. Kill ALL spawned adds BEFORE killing Waxwork Abolishion. This means the 'reinforcement' adds (a waxwork ambusher, a waxwork soldier & a waxwork zealot) as well as any a waxwork globule adds. The split adds are not included (see above). |
N / A |
|
Waxwork Abolishion: Wax Denial 121625 |
10 |
Do not let any waxwork globules to spawn. During the event, a red decal / circle will appear (EMOTE: 'The Waxwork Abolishion ignites and launches a barrage of hot wax globs high into the air.'). Have at least one (1) Player stand in the decal / aura to prevent any a waxwork globule spawning. |
N / A |
|
Waxwork Abolishion: The Final Flicker 010826 |
10 |
Kill all five (5) split adds. During this event, Waxwork Abolishion will split into adds every 20% (see above). Make sure they are ALL defeated before killing Waxwork Abolishion. To do this, balance them down. When one (1) of them dies, you have 15-Seconds to kill as many as the others as you can before they reform into Waxwork Abolishion. Once they are killed, they stay dead (they don't come back) and reduce the HP of the reformed Waxwork Abolishion. They ALL need to be killed by the last (3rd) split. I suggest to kill at least one (1), then (2) and then (2). |
N / A |
|
Hero of Arcstone, Shattered Isles From Black Jay in Arcstone Shattered Isles, key word 'Smaller.' 121525 |
10 |
Complete the listed Mission. Base Strategy: Say 'Ready to Black Jay, to zone into the instance. Start the event by saying 'Now' to Torm the Golden, who is right near where you zone in at the broken bridge. Next, a runic worker and a stony worker will come running to attack you. Kill them both (you can remove their buffs by taking them into one of the magical storms, if you need to). Once they are dead The Colossus of Skylance will aggro. He can cause you to Feign Death, so stand back up ASAP! Adds will spawn along the way (a bedeviled scrykin, a crazed scrykin and an absent scrykin) ), so be ready for them (leave an absent scrykin alone.... they don't aggro unless you do something to them)! They will despawn when The Colossus of Skylance dies... so kill them or not. You need to at least control them (off tank or have the tank aggro them all) until The Colossus of Skylance is dead. Open a glowing chest (nearby) for loot. |
+1 Hero's Fortitude AA +1 Hero's Vitality AA |
|
Savior of Arcstone, Shattered Isles 010426 |
15 | Complete the three (3) listed Achievements. |
+1 Hero's Fortitude AA +1 Hero's Resolution AA +1 Hero's Vitality AA |
|
Colossus: The Sky is Falling (Group) 010526 |
10 |
No group member can be hit by Skyfall debris. During this event, one (1) Player, at a time, will get an emote. A reddish ground aura will appear around / near the Player named in the emote. Everyone needs to move out of that aura before it triggers (you have about 15-Seconds to do this). No one can fail this, at all. |
EMOTE: The Colossus tosses a large stone into the air and it hovers heavily over Player. FAIL EMOTE: A huge chunk of stone slams into the ground. |
|
Colossus: Crack the Defenses (Group) 010526 |
10 |
Don't allow The Colossus have both armors at the same time. Keep The Colossus in one (1) of the 'Magic Storms' for the entire battle. This is not as simple as it sounds, as the 'Magic Storms' continuously move, so the main tank has to keep dragging The Colossus about to keep him inside the 'Magic Storm.' |
EMOTE (Armor Buff): The Colossus glows and runes flow around it. EMOTE (Adds): A massive stone foot slams the ground creating a shockwave. EMOTE (Adds): Skittering and odd crooning sounds can be heard even before the creatures making them teleport into the area. |
|
Colossus: Full Defense (Group) 121525 |
10 |
Make sure that always has at least one armor, at all times. The Colossus of Skylance has buffs that can be removed by taking it into one of the magical storms. Don't fight him in either Magical Storm. |
N / A |
|
Hero of Ruined Relic From Gwork in Ruined Relic, key word 'xxxxx.' 122025 |
10 |
Complete the listed Mission. Base Strategy: Say 'Ready' to Gwork to zone in. Say 'xxx' to Gwark (on the ramp near where you zone in) to start the event. he best way to defeat this mission is to go full burn on Shar'Drahn at about 77% while fully ignoring the aura / decals and adds. Adds will appear but do not attack right away. Kill Shar'Drahn fast enough and you will not many adds to heal through. Take a good tank, a good healer and good DPS. Otherwise...
|
+1 Hero's Fortitude AA +1 Hero's Vitality AA |
|
Savior of Ruined Relic 021526 |
15 | Complete the three (3) listed Achievements. |
+1 Hero's Fortitude AA +1 Hero's Resolution AA +1 Hero's Vitality AA |
|
Shar'Drahn: Heads Up (Group) 122025 |
10 |
No one can be hit by falling rocks. During this event, there will be about three (3) large round boulders that drop from the sky. If they hit you, you will suffer damage! Before they drop, red circles / decals will appear on the ground. Everyone (not just the emoted player) must avoid those locations, every time! |
EMOTE: Fragments of Arcstone plummet to the ground. (You have 20-seconds to avoid the falling rock locations.) |
|
Shar'Drahn: Unduplicated (Group) 122025 |
10 |
No one can be copied by a storm. During this event, there are 'magical storms' that roam about. One storm is light-blue in color. This storm must be avoided by everyone... otherwise it will 'duplicate' any Players inside it into a 'twisted' add (a twisted duplicate). These adds are nasty and can / will wipe the group. |
N / A |
|
Shar'Drahn: Only The Young (Group) 021526 |
10 |
Do not allow any Elder Monolith to be summoned. At least one (1) Player must get into the aura / decal, every time it appears, to prevent the Elder Monolith add from spawning (as a note, other easier adds will spawn, however). |
EMOTE: Shar'Drahn places a call to the storm for assistance. |
|
Hero of Labyrinth of Spite From Kerina, Lost Soul in Labyrinth of Spite, key word 'Group.' 122025 |
10 |
Complete the listed Mission. Base Strategy: This event involves an echo as the primary target. Before starting, everyone needs to be illusioned as the same race (place an illusion campfire or use any other method available to the entire group).
|
+1 Hero's Fortitude AA +1 Hero's Vitality AA |
|
Savior of Labyrinth of Spite 010726 |
15 | Complete the three (3) listed Achievements. |
+1 Hero's Fortitude AA +1 Hero's Resolution AA +1 Hero's Vitality AA |
|
Echo of Hate: Give in to Greed (Group) 010726 |
10 |
Get rid of all the greedlings by giving them what they want. During this event, there is only one (1) a greedling, despite the plurality used in the achievement. When a greedling appears, do not over DPS / kill it. Instead... let the tank hold aggro and solo it down. At three 93) different times a greedling will go inactive with an emote. When this happens, give 100 Platinum to a greedling. The third time you do this, a greedling will despawn. EMOTE: A greedling stops and sniffs the air, holding its hand out. |
EMOTE: A greedling stops and sniffs the air, holding its hand out. (Give 100 Platinum to a greedling.) |
|
Echo of Hate: What it Wants (Group) 010726 |
10 |
Trigger the Dark Flagellant first and allow it to ascend. During this event, when it comes time to clicking one of the four 'crystals,' click the North crystal first, where you will encounter Dark Flagellant. Do not DPS / kill Dark Flagellant. As suggested by his name, Dark Flagellant is damaging himself. Dark Flagellant will drop 3%+ in health every tic (6-seconds). This achievement involves just standing there, until Dark Flagellant kills himself. Just be sure to keep the group healed because the damage is not just to Dark Flagellant, but also to the group ('Feeling What I Feel,' a 15.2K Base Damage AoE). |
N / A |
|
Echo of Hate: Unfocused (Group) 010726 |
10 |
Don't allow the Echo to focus its hatred into any magical stones. During the final phase of this event, there will emotes indicating the need to click one (1) of the 'switches.' Follow the emotes to get this achievement. Failing to click the correct switch will cause a temporary buff / boost for an echo (see right). Successful clicks will stop said effects. |
EMOTE: The Echo burns with hatred of the weak and focuses it into one of the magical stones. (East, fail and an echo gets bigger and does more damage). EMOTE: The Echo roils with hatred for all that are not it and focuses it into one of the magical stones. (South, fail and an echo gets a PB AoE that is a snare, HP Damage and Mana Drain) EMOTE: The Echo glares with rage at all of its opponents and focuses it into one of the magical stones. (West, fail and an echo gets a high flurry rate) EMOTE: The Echo starts to gather all of its self loathing and focuses it into one of the magical stones." (North, fail and an echo will drop in HP, but gets a Rune / Shield that is 3X the amount of HP dropped... so it is really like a gain of HP, that a loss). |
BACK TO TOP OF CATEGORY BACK TO TOP OF PAGE
--------------------------------------------------------------------
|
NAME |
POINTS | NOTES |
|
Conqueror of Candlemaker's Workshop: Waxwork Abolishion 010826 |
20 | Defeat the noted Raid event. |
|
Vanquisher of Candlemaker's Workshop: Waxwork Abolishion 012226 |
30 | Complete the three (3) listed Achievements. |
|
Waxwork Abolishion: Waxing Intensity 012226 |
10 |
Allow five (5) or more waxwork globules to spawn. During this event, while Waxwork Abolishion is active, three (3) ground auras (decals) will periodically appear around Waxwork Abolishion. Leave at least one (1) of them unoccupied by Players to cause a waxwork globule add to spawn. Do this until five (5) a waxwork globule have spawned (and kill them). |
|
Waxwork Abolishion: Wax Free Zone 011526 |
10 |
Do not allow any waxwork globules to spawn. During this event, while Waxwork Abolishion is active, three (3) ground auras (decals) will periodically appear around Waxwork Abolishion. EMOTE: 'The Waxwork Abolishion ignites and launches a barrage of hot wax globs high into the air.' Be sure that at least five (5) Players quickly move into each ground aura (decal) to prevent any a waxwork globule from spawning. This must be done every time the ground auras (decals) appear. |
|
Waxwork Abolishion: Snuffed Out, Fired Up 011526 |
10 |
Kill all five (5) waxwork splits throughout the fight. At certain points during this event, Waxwork Abolishion will split into as many as five (5) mini versions of itself. Killing any one (1) of them will cause the others to reform into Waxwork Abolishion after about 15-Serconds. Waxwork Abolishion only splits four (4) times, but there are five (5) of them. So you need to kill at least two (2) or more of them of them with each split round, so that they are all killed by the final round. You can kill all the splits in the first round, if you like, but I recommend 1 (one), then 2 (tw0) and then 2 (two). The way to do this is to balance the splits down each round so that when one (1) of them dies, you can also kill at least one (1) more before the fifteen-second timer causes them to reform into Waxwork Abolishion. Each split that is killed will not respawn again. |
|
Conqueror of Candlemaker's Workshop: Invaders 010526 |
20 |
Defeat the noted Raid event. |
|
Vanquisher of Candlemaker's Workshop: Invaders 100526 |
30 | Complete the three (3) listed Achievements. |
|
Invaders: Unmelted 100526 |
10 |
Do not allow any a candlefolk defender or a candlemaster to die. At about 65% (an any of the three bosses), two (2) a candlefolk defender will spawn (they can be charmed). At about 56% (1) a candlemaster will spawn, that, if allowed, will attack the bosses. After that, candle spawns will alter between the two and the one add (at about 48%, 32%, 24%, 16%, 8% & 1%. This one is tricky. The keys here are:
|
|
Invaders: Enemy of my Enemy 010526 |
10 |
Break the 'Stormshield' with 'Firecrash' each time Glarubaran, the Great Storm puts it up. After about 40%, keep Teknaz, Bringer of Flames near Glarubaran, the Great Storm, as Teknaz, Bringer of Flames will use 'Firecrash' and it will hit Glarubaran, the Great Storm. Make sure they are in close proximity to each other so this happens. |
|
Invaders: No Interaction 070526 |
10 |
Don't allow Lifeleash (a 500-range 450K AoE DD), Stormshield (a reflect) or Firecrash (a 150 AoE Range 13K mana drain) to interact or hit a boss. When any of the three bosses (Glarubaran, the Great Storm, Teknaz, Bringer of Flames or The Loathing Lord) approach 45% drag them 500+ range away from each other, so that their special attacks do not hit or interact each other. |
|
Conqueror of Arcstone, Shattered Isles: Xanzerok 021226 |
20 | Defeat the noted Raid event. |
| Vanquisher of Arcstone, Shattered Isles: Xanzerok
081626 |
40 | Complete the four (4) listed Achievements. |
|
Xanzerok: Tanglefoot Evasion 081626 |
10 |
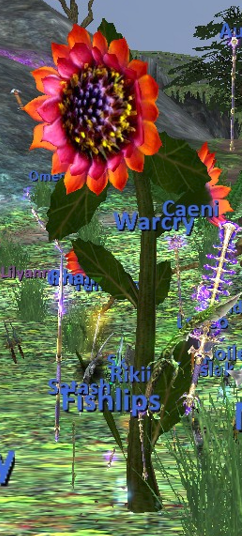
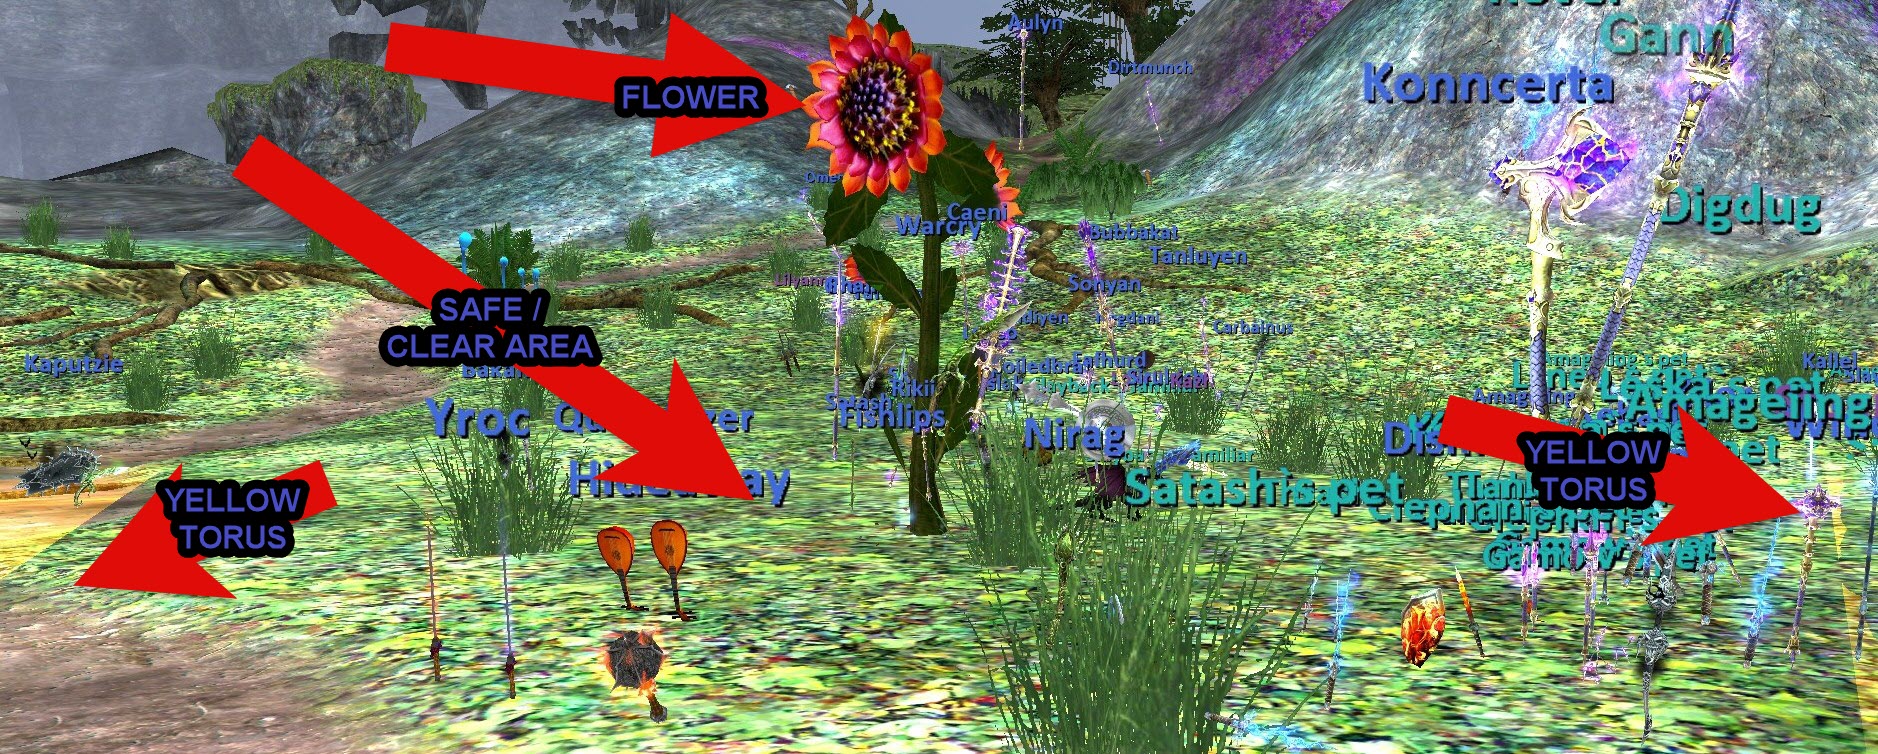
Allow no strangle root crawlers to spawn. During the event, about every 55-Seconds, a strangle root crawler will spawn for each Player that does not move to the 'flower' in time. EMOTE: 'Xanzerok calls on the roots deep within the grove and the ground rumbles with their answer.' A large donut shaped yellow ring will appear around the event area. One one side of the yellow ring will be a pie slice missing and is where the 'flower' will be (it's a big red flower and hard to miss (use /hidemodels all if you have trouble spotting it). Move to the 'flower' ASAP! Everyone must do this (except the main tank?)... every time, so that no a strangle root crawler spawns, at all (they only spawn for Players that fail to get to the flower and out of the yellow aura / decal). |
| Xanzerok: Banished Manifestation
042326 |
10 |
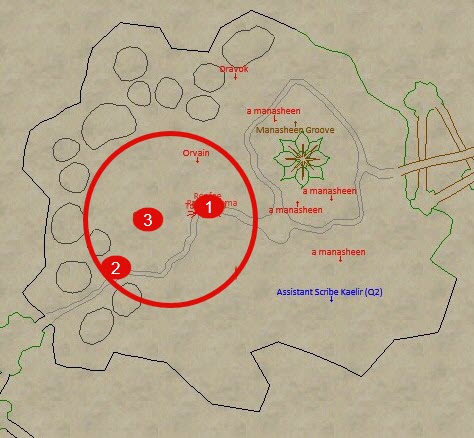
Kill all a manifestation of Okahn. Kill every a manifestation of Okahn (100%) before it reaches Xanzerok. There will be an emote ('A howl echoes throughout the grove as houndlike manifestations begin to coalesce from the shadows of Player and Player.') When the emote happens, those two (2) Players need to back away to the edge of the event area ASAP. Each a manifestation of Okahn will spawn near / where ever those two (2) Player are. The further a manifestation of Okahn is away from the tree, the longer the raid has to kill a manifestation of Okahn (they do not aggro or fight back). Each a manifestation of Okahn will drag one (1) of the the emoted Players ('Grasping Shadow Pull') along with them... as they slowly move towards Xanzerok. If a manifestation of Okahn is not killed before it reaches Xanzerok, Xanzerok, the Player that is being dragged will be hit with 'Ironbark Hurl' (a 9 Billion DD and a knock back / knock up... essentially a Death Touch). Give the a manifestation of Okahn a level of priority over any other adds that may be up. |
|
Xanzerok: Uprooted 030526
|
10 |
Allow ten (10) or more strangle root crawlers to spawn. During the event, about every 55-Seconds will call for assistance. EMOTE: 'Xanzerok calls on the roots deep within the grove and the ground rumbles with their answer.' A large donut shaped yellow ring will appear around the event area. On one side of the yellow ring will be a pie slice missing and is also where a flower will appear (it's a big red flower will appear and hard to miss (use /hidemodels all if you have trouble spotting it). Failing this will spawn a strangle root crawler each Player that does not move to the flower in time. Assign a couple of (Players to purposely fail this emote each time, until ten (10) a strangle root crawler have spawned. Kill a strangle root crawler when they appear. Have everyone else move to the flower ASAP! Everyone must do this (except the main tank)... you don't want to wipe from having way too many a strangle root crawler adds!
|
|
Xanzerok: Enraged 031926 |
10 |
Defeat the event using enraged option. Win this event after selecting the 'enraged' version of this raid. This just means the raid will start with Xanxerok all ready enraged and there will be bonus loot drops(s). |
|
Conqueror of Arcstone, Shattered Isles: Colossus 021626 |
20 | Defeat the noted Raid event. |
|
Vanquisher of Arcstone, Shattered Isles: Colossus xxxxxx |
40 | Complete the four (4) listed Achievements. |
|
Colossus: The Sky is Falling xxxxxx |
10 |
Nobody gets hit by any of the Skyfall debris. After about 50%, 'Skyfall' will begin. A purple-ish aura will appear somewhere in the event asrea. More than one can be up at a time. It's a good sized aura. Everyone needs to move out of and / or avoid that area immediately (you have about 1-tic). This must be done every time! One methods is to Colossus near the border of the event area and have the entire raid bunch up by the tank, then move with the tank to avoid the auras. EMOTE: 'The colossus tosses a large stone into the air and it hovers heavily over Player.' |
|
Colossus: Crack the Defenses 031926 |
10 |
Don't let Colossus have both armors active at any given time. Drag Colossus into the proper Magical Storm and keep him there until his 'Runic Armor' (spell shielding) or 'Stony Armor' (melee shielding) buff is removed. Do this every time he gets a buff. Only the tank needs to do this... the rest of the raid needs to stay put to avoid damage from the 'Magical Storm.' EMOTE: 'The Colossus glows and runes flow around it.' (Drag Colossus into the red 'Magical Storm'). EMOTE: The storm tears away the runic protection of The Colossus of Skylance. ('Rune Armor' buff removed, go back to raid). EMOTE: The Colossus glows and a layer of armored stone surrounds it. (Drag Colossus into the blue 'Magical Storm'). EMOTE: The storm tears away the stony protection of The Colossus of Skylance. ('Stony Armor' buff removed, go back to raid).
|
|
Colossus: Full Defense 083126 |
10 |
Ensure that Colossus one armor active at all times. When Colossus gets one of armor buffs, don't remove it! Only remove one of them when he has both buffs at the same time (see above). |
|
Colossus: Enraged 031926 |
10 |
Defeat the event using enraged option. Win this event after selecting the 'enraged' version of this raid. This just means the raid will start with Colossus all ready enraged and there will be bonus loot drops(s). |
|
Conqueror of Ruined Relic: Ashenback 021926 |
20 | Defeat the noted Raid event. |
|
Vanquisher of Ruined Relic: Ashenback 093026 |
40 | Complete the four (4) listed Achievements. |
|
Ashenback: Frost Frozen 093026 |
10 |
Once frost storm can appear, only remove laval armor from Ashenback using frost storm. During this event Ashenback will buff itself with 'Laval Armor.' This is a 1.9 Billion HP rune. You can DPS it away, but to get this achievement you need to cast cold spells on a susceptible 'Firestorm' (EMOTE: A firestorm becomes unstable.) and tuirn it into a Frost Storm (EMOTE: A firestorm falters and changes into something new.), then drag Ashenback into the Frost Storm to remove the buff. Be wary not to drag Ashenback into the other storm while doing this, as it can re-establish the buff you just removed. |
|
Ashenback: Frost Free 021926 |
10 |
Do not use frost storm to remove laval armor from Ashenback. During this event Ashenback will buff itself with 'Laval Armor.' This is a 1.9 Billion HP rune. DPS it away. |
|
Ashenback: Don't Stand in the Fire 040526 |
10 |
No one stands in the puddle of flame. During this event, statioanry puddle of flames will spawn off of the 'Firestorm' magical auras (EMOTE: A small puddle of flames breaks off from the great firestorm.). No one can stand (move into) any of them, at all. |
|
Ashenback: Enraged 033026 |
10 |
Defeat the event using enraged option. This just means the raid will start with Ashenback all ready enraged and there will be bonus loot drops(s).
|
|
Conqueror of Ruined Relic: Shar'Drahn 030126 |
20 | Defeat the noted Raid event. |
|
Vanquisher Ruined Relic: Shar'Drahn 082726 |
40 | Complete the four (4) listed Achievements. |
|
Shar'Drahn: Heads Up 030826 |
10 |
No one can get hit by falling rocks. During this event there will be an emote ('You hear stones crash into each other in the air above the platform, the shockwave temporarily disperses the storms.') and an aura / decal will appear on the ground somewhere. Everyone needs to avoid that spot so the falling rocks don't hit them. |
|
Shar'Drahn: Unduplicated 082726 |
10 |
No one can be copied by a storm. Avoid the light blue 'Magical Storms' at all costs! This can be a wipe mechanic if not avoided, as it will spawn nasty 'twisted' duplicates of every Player that gets caught inside said 'Magical Storm.' |
|
Shar'Drahn: Only The Young 030126 |
10 |
Allow no Elder Monolith to be summoned. Each time an aura / decal spawns, at least one (1) or two (2) Players needs to get in that aura (10-Seconds... hurry!) to prevent a Elder Monolith from spawning. |
|
Shar'Drahn: Enraged 082726 |
10 |
Defeat the event using enraged option. This just means the raid will start with Shar'Drahn all ready enraged and there will be bonus loot drops(s). |
|
Conqueror of The Vortex: The Egg 060725 |
20 | Defeat the noted Raid event. |
|
Vanquisher of The Vortex: The Egg 060726 |
40 | Complete the four (4) listed Achievements. |
|
The Egg: Generations 082326 |
10 |
Allow no healthy eggs to be destroyed. During this event a number of a good egg will appear. Do not let any of them die. Heal them! |
|
The Egg: Starvation xxxxxx |
10 |
Allow no foodstuff to reach Tallongast. During this event, three (3) different non-aggro 'foodstuff' (root models) adds will spawn and move towards Tallongast, the Egg. Kill them all (100%) before they reach Tallongast, the Egg. |
|
The Egg: Well Fed xxxxxx |
10 |
Allow Tallongast to eat all of the foodstuff. During this event, three (3) different non-aggro 'foodstuff' (root models) adds will spawn and move towards Tallongast, the Egg. Do NOT kill any of them! Let them reach Tallongast, the Egg. |
|
The Egg: Enraged 092826 |
10 |
Defeat the event using enraged option. Win this event after selecting the 'enraged' version of this raid. This just means the raid will start with Tallongast all ready enraged and there will be bonus loot drops(s). |
|
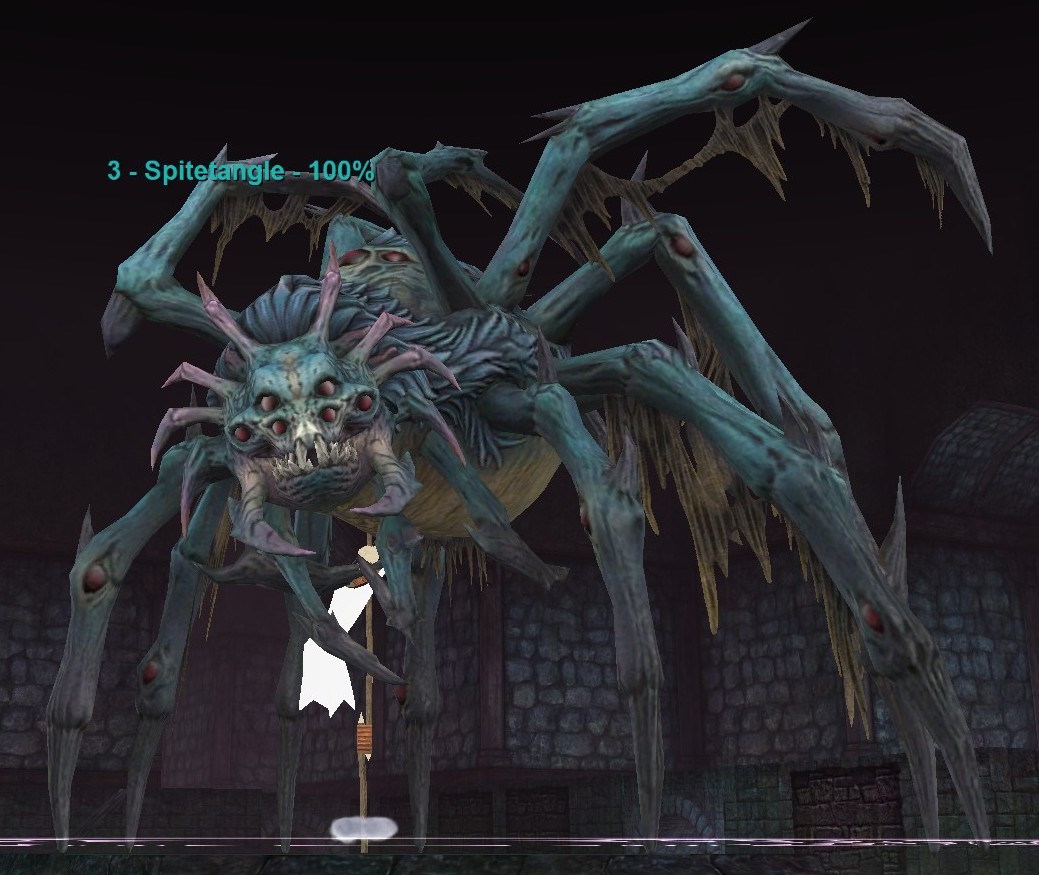
Conqueror of Labyrinth of Spite: Spitetangle 061826 |
20 | Defeat the noted Raid event. |
|
Vanquisher of Labyrinth of Spite: Spitetangle xxxxxx |
40 | Complete the four (4) listed Achievements. |
|
Spitetangle: Avengement 061826 |
10 |
Defeat Vengecoil and Vengeskin at the same time. During this event Vengecoil and Vengeskin will go active in the last stage of the event. They are stationary, so you have to send split forces to go attack / aggro them ASAP. Balance them down so they both die at the same time. |
|
Spitetangle: Sticky xxxxxx |
10 |
Trap every rusher in webbing, at least once each. During this event a rusher add will spawn and go after an emoted Player. Have a rogue place a 'Spiteful Web' trap, to trap each a rusher at least once. The traps are obtained from a trapper adds, who place them (Rogues can disarm / take them and use them on a rusher). |
|
Spitetangle: Cracked 061826 |
10 |
No one can be entangled in stone for more than 2 Minutes (160-Seconds or 20 Tics). During this event, two (2) Players at a time will get 'banished' into a Stonetangle Prison, somewhere in the surrounding hallways. They ALL need to be broken out ASAP (attack and destroy the non-aggro Stonetangle Prison) within 20-Tics. The Players in the trap can also attack the Stonetangle Prison from the inside. It may help if the Players open their map and /rsay what direction to find them. |
|
Spitetangle: Enraged 091026 |
10 |
Defeat the event using enraged option. Win this event after selecting the 'enraged' version of this raid. This just means the raid will start with Spitetangle all ready enraged and there will be bonus loot drops(s). |
|
Conqueror of Labyrinth of Spite: Echo of Hate 081026 |
20 | Defeat the noted Raid event. |
|
Vanquisher of Labyrinth of Spite: Echo of Hate xxxxxx |
40 | Complete the four (4) listed Achievements. |
|
Echo of Hate: Give in to Greed 081026 |
10 |
Get rid of all the greedlings by giving them what they want. EMOTE: A greedling stops and sniffs the air, holding its hand out. EMOTE: A greedling, satiated with shiny coins, disappears. During this event a greedling adds will spawn. Tank them until they temporarily de-aggro and 'hold their hand out' (emote). Give them 10-Platinum each time, EVERY time. They will emote and despawn / leave after they are 'satiated' by 30-Platinum. |
|
Echo of Hate: What it Wants xxxxxx |
10 |
Trigger the Dark Flagellant first, and allow it to ascend. During this event the Dark Flagellant is trying to kill himself and ascend. Rather than healing him to stop it, let him die and ascend. HOWEVER... do this event LAST! This is becuase the invisible / unseen Ascended Dark Flagellant will start casting 'Ascended Pain' (AoE 550K HP DD) on the raid every 15-Seconds! Non-splash heal, heal, heal! |
|
Echo of Hate: Unfocused xxxxxx |
10 |
Do not allow the Echo to focus it's hatred into any of the magical stones. EMOTE: The Echo burns with hatred of the weak and focuses it into one of the magical stones. (East) EMOTE: The Echo starts to gather all of its self-loathing and focuses it into one of the magical stones. (North) EMOTE: The Echo roils with hatred for all that are not it (South) EMOTE: The Echo glares with rage at all of its opponents and focuses it into one of the magical stones. (West) During this event, in the final phase... an echo have four different emotes that indicate the need to successfully click one (1) of the four (4) floating crystals (one at each doorway, N, S, E & W) within about 10-Seconds. The correct crystals much be clicked, by someone, EVERY time. This might be best accomplished by placing a Player backed into each doorway, and stay there, to click their crystal when needed. |
|
Echo of Hate: Enraged xxxxxx |
10 |
Defeat the event using enraged option. Win this event after selecting the 'enraged' version of this raid. This just means the raid will start with an echo all ready enraged and there will be bonus loot drops(s). |
--------------------------------------------------------------------
Hunter Achievements do not require you to be in zone. Just be in the group / raid and you will get credit for the Hunter kill, no matter where you are.
|
NAME |
POINTS | NOTES | REWARD(S) |
|
Novice Shattering of Ro Hunter 121925 |
30 | Complete the two (2) listed Achievements. | Stormslayer's Satchel (44-Slot 100% Bag) |
|
Hunter of Scarred Grove 121725 |
35 | Defeat the thirteen (13) listed targets. | N / A |
|
Hunter of Candlemaker's Workshop 121925 |
25 | Defeat the ten (10) listed targets. | N / A |
|
Adept Shattering of Ro Hunter 011626 |
40 | Complete the two (2) listed Achievements. |
Stormslayer's Rucksack (46-Slot 100% Bag). |
|
Hunter of Arcstone, Shattered Isles 011626 |
20 | Defeat the eight (8) listed targets. | N / A |
|
Hunter of Ruined Relic 122925 |
20 | Defeat the eight (8) listed targets. | N / A |
|
Veteran of Shattering of Ro Hunter 020626 |
50 | Complete the two (2) listed Achievements. | Stormslayer's Backpack (48-Slot 100% Bag). |
|
Hunter of The Vortex 020626 |
25 | Defeat the nine (9) listed targets. | N / A |
|
Hunter of Labyrinth of Spite 011426 |
25 | Defeat the ten (10) listed targets. | N / A |
BACK TO TOP OF CATEGORY BACK TO TOP OF PAGE
--------------------------------------------------------------------
|
NAME |
POINTS | NOTES |
|
The Scars We Bear 122925 |
25 | Complete the two (2) listed Achievements. |
|
Scarred Grove Scavenger 122825 |
20 | Complete the four (4) listed Achievements. |
|
Seeds of Growth 122825 |
10 |
Acquire and 'collect' (click) the eight (8) listed items. These are known to drop in Scarred Grove from wolves & treants (and maybe the plants). |
|
Legacies of Nature 121225 |
10 |
Acquire and 'collect' (click) the eight (8) listed items. These ground spawns are primarily found in the northern areas of Scarred Grove. |
|
Remnants of War xxxxxx |
10 |
Acquire and 'collect' (click) the eight (8) listed items. These are known to drop in Scarred Grove from undead and the MoB's from each camp. |
|
Earthborn Oddities 120225 |
10 |
Acquire and 'collect' (click) the eight (8) listed items. These are known to drop in Scarred Grove from golems. |
|
Candlemaker's Workshop Scavenger 122925 |
20 | Complete the four (4) listed Achievements. |
|
What Burns 122925 |
10 |
Acquire and 'collect' (click) the eight (8) listed items. These can drop from 'zone trash' in the Waxwork Abolishion mission in Candlemaker's Workshop. |
|
Stay Waxy 121425 |
10 |
Acquire and 'collect' (click) the eight (8) listed items. These are ground spawns in Candlemaker's Workshop. |
|
Tinker's Lost Trinkets 121925 |
10 |
Acquire and 'collect' (click) the eight (8) listed items. These are ground spawns in Candlemaker's Workshop. |
|
Lost and Found 120925 |
10 |
Acquire and 'collect' (click) the eight (8) listed items. These are known to drop in Candlemaker's Workshop from most trash MoB's in the zone. |
|
Echo's of Arcstone xxxxxx |
30 | Complete the two (2) listed Achievements. |
|
Arcstone, Shattered Isles Scavenger xxxxxx |
20 | Complete the four (4) listed Achievements. |
|
Roots of Decay xxxxxx |
10 |
Acquire and 'collect' (click) the eight (8) listed items. These are drop from 'root' MoB's in Arcstone, Shattered Isles. |
|
Relics of the Fallen Order xxxxxx |
10 |
Acquire and 'collect' (click) the eight (8) listed items. These are drop from undead in Arcstone, Shattered Isles. |
|
Relics of the Shattered Sky 121425 |
10 |
Acquire and 'collect' (click) the eight (8) listed items. These are ground spawns in Ruined Relic. |
|
Stones of the Sky 121725 |
10 |
Acquire and 'collect' (click) the eight (8) listed items. These are ....... in Arcstone, Shattered Isles. |
|
Ruined Relic Scavenger xxxxxx |
20 | Complete the four (4) listed Achievements. |
|
Shards of the Spellstorm 011526 |
10 |
Acquire and 'collect' (click) the eight (8) listed items. These are ....... in Ruined Relic. |
|
Ashes of the Shattered 122825 |
10 |
Acquire and 'collect' (click) the eight (8) listed items. These are ....... in Ruined Relic. |
|
Relics of the Forbidden 122925 |
10 |
Acquire and 'collect' (click) the eight (8) listed items. These are known to drop in Ruined Relic from Scrykin MoB's. |
|
Echoes of the Broken Mind xxxxxx |
10 |
Acquire and 'collect' (click) the eight (8) listed items. These can drop from 'zone trash' (primarily scrykin) in the Shar'Drahn mission in Ruined Relic. |
|
Vestiges of the Vortex xxxxxx |
35 | Complete the two (2) listed Achievements. |
|
The Vortex Scavenger xxxxxx |
20 | Complete the four (4) listed Achievements. |
|
Wellspring of the Shattering 122925 |
10 |
Acquire and 'collect' (click) the eight (8) listed items. These are primarily found as ground spawns in the nest / bird & biomechanical / octopus areas of The Vortex. |
|
Cores of Converged Chaos 123125 |
10 |
Acquire and 'collect' (click) the eight (8) listed items. These are primarily found as ground spawns in the 'cloth' and 'scrykin' areas of The Vortex. |
|
Fusion of the Impossible 123125 |
10 |
Acquire and 'collect' (click) the eight (8) listed items. These are known to drop in The Vortex from scrykin MoB's. |
| Relics of the Storm | 10 |
Acquire and 'collect' (click) the eight (8) listed items. These are known to drop in The Vortex from cloth butterfly MoB's. |
|
Labyrinth of Spite Scavenger 121425 |
20 | Complete the four (4) listed Achievements. |
|
Fragments of Spite 121425 |
10 |
Acquire and 'collect' (click) the eight (8) listed items. These are ground spawns in the sewer section of Labyrinth of the Spite. |
|
Venomous Last Words 121325 |
10 |
Acquire and 'collect' (click) the eight (8) listed items. These drop in Labyrinth of the Spite, primarily from spiders, drachnids and golems. |
|
Darkened Bones 121325 |
10 |
Acquire and 'collect' (click) the eight (8) listed items. These drop in Labyrinth of the Spite, primarily from Dark Elves & Dark Gnomes. |
|
Detritus of Detestation 121325 |
10 |
Acquire and 'collect' (click) the eight (8) items. These are ground spawns in the upper area of Labyrinth of the Spite. |
BACK TO TOP OF CATEGORY BACK TO TOP OF PAGE
--------------------------------------------------------------------
The generic strats / info below are from Dev Beta notes, successful raids that I was part of, from what I recall and / or from research. The below info does not include details on how to complete raid-related achievements. Those are noted elsewhere on this page, if there are any. The below info should be adapted, as seen fit, by your Raid Leader. Raid make-up (classes, levels, Player skill levels, etc.) can and do make a difference on raid strategy options and winning or losing. Key emotes may also be noted below. Players fulfilling their roles, using assist, and following emotes is always essential. There is all most always more than one variant strategy that can successfully defeat a raid. As Levels increase, defeating old raids can prove much easier and more forgiving (potentially even as a group or solo / molo, depending on how old the raid event is). However, sometimes, certain mechanics still have to be honored. It has been known that in some events, due to such raid mechanics (i.e. too much DPS; killing MoB X before MOB Y; and similar) can bug the raid and cause it to fail. Some of these targets may require 'zerging' into the zone get to them (kill stuff along the way). They may also have 'adds' which are normally more like 'trash' MoB's. The original / older targets / encounters were pre-raid window events. Those 'raids' were more of a collective effort, or better, an extremely challenging group event. Any effects noted below can sometimes 'scale to level,' so the effects can be lesser or greater than stated, depending on raid force character levels. On Progression servers, targets can use 'Mitigation of the Mighty' (mitigates Spell, Melee & DoT Damage), at least until such time as certain later expansions unlock, which is typically at least seven-plus expansions after the expansion of the related target. While older targets are static open-world (non-instance) events, there are now an Agent of Change in various locations that will offer an instanced version of those same events (noted below, if any).
Tier 1 raids unlocked in January 2026. Tier 2 raids unlocked in February 2026. Tier 3 raids unlocked in March 2026.
THE INVADERS (Tier 1) WORKSHOP ABOLISHION (Tier 1)
COLOSSUS OF SKYFIRE (Tier 2) XANZEROK (Tier 2) ASHENBACK (Tier 2) SHAR'DRAHN (Tier 2)
TALLONGAST, THE EGG (Tier 3) SPITETANGLE (Tier 3) ECHO OF HATE (Tier 3)
If I missed anything or got something wrong, let me know!
|
CANDLEMAKER'S WORKSHOP - THE INVADERS (Tier 1) From Defender Tiggle in Candlemaker's Workshop, key word 'Large.' |
|||
|
The gods of the three armies and, frankly, their most competent leadership, have moved on. None of the armies have really trusted or liked each other, and now that their leaders have left, they are struggling to work together. But, of course, they still can work together to defeat their mutual enemies. When the event starts the three bosses, Teknaz, Bringer of Flames, Glarubaran, the Great Storm, and a Loathing Lord are standing about glaring at each other.
STAGE ONE: Have pore-assigned tanks aggro their assigned boss and stack them together.
STAGE TWO: All bosses individually start summoning adds every 12% (80%, 68%, 56%, 44%, 32%, 20%, 8%). Careful DPS control can trigger the add spawns separately, rather than at the same time.
STAGE THREE: 'Candlefolk' adds begin and attack (at about 65%), as they see the raid as 'intruders.'
STAGE FOUR: The bosses each start casting spells that might not be helpful to each other. They held back until now, but imminent death has made them care a lot less about their alliance (these are cast every 5%).
Defeat all three (3) bosses and win the event. |
EMOTE: With a scream, a furious goblin rushes into the area holding several explosive devices. (a payload specialist has spawned.) EMOTE: A flame elemental charges into the area. (a flame elemental has spawned.) EMOTE: Moaning, shambling forms appear.(Three (3) an inferior spite have spawned.) EMOTE: Candlefolk appear to join the battle. (Candlefolk adds have spawned.) EMOTE: The Loathing Lord begins casting Mummy's Touch. EMOTE: The Loathing Lord begins casting Aggressive Mummy's Touch. (Out of balance enhanced spell cast). EMOTE: The Loathing Lord begins casting Lifeleash. EMOTE: Glarubaran, the Great Storm begins casting Lightning Flash. EMOTE: Glarubaran, the Great Storm begins casting Impressive Lightning Flash. (Out of balance enhanced spell cast). EMOTE: Glarubaran, the Great Storm begins casting Stormshield. EMOTE: Teknaz, Bringer of Flames begins casting Firesplash. EMOTE: Teknaz, Bringer of Flames begins casting Inspired Firesplash. (Out of balance enhanced spell cast). EMOTE: Teknaz, Bringer of Flames begins casting Firecrash. |
||
|
CANDLEMAKER'S WORKSHOP - WORKSHOP ABOLISHION (Tier 1) From Defender Tovani in Candlemaker's Workshop, key word 'Large.' |
|||
|
Another of Brell's long abandoned creations, this war beast has been reawakened after the invading forces attacked, resulting in the destruction of part of the candlefolk's forest. The Waxwork Abolishion will rotate between two stages... the Waxwork Abolishion with adds and auras (decals); and split into five (5), or less, smaller sized versions of Waxwork Abolishion (variable percentage based). BASE STARTEGY:
Waxwork Abolishion uses:
Start the event by the tank talking to Waxwork Abolishion (keyword: 'Destroy.').
|
EMOTE: The Waxwork Abolishion is fired up as its flames burn bright. (Waxwork Abolishion is doing extra damage.) EMOTE: The Waxwork Abolishion begins to cool down. (Waxwork Abolishion is no longer doing extra damage.) EMOTE: The Waxwork Abolishion splits its fire and shifts its wax, preparing to separate. (Waxwork Abolishion is about to split into adds.) EMOTE: The Waxwork forms groan and begin preparations to reform. (Waxwork Abolishion is reforming.) EMOTE: The wax surrounding the area begins to form into additional reinforcements. (Three waxwork adds incoming.) EMOTE: The Waxwork Abolishion ignites and launches a barrage of hot wax globs high into the air. (Six Players are needed, immediately, in each red aura / decal to prevent additional adds and more damage.) |
||
|
ARCSTONE, SHATTERED ISLE - XANZEROK (Tier 2) From Black Jay in Arcstone, Shattered Isle, key word 'Large.' |
|||
|
Xanzerok is an ancient treant that has grown irrationally aggressive due to the destruction of Arcstone. Now viewing anyone and anything a threat to what is left of his grove, he now lashes out at even would-be allies. BASE STRATEGY:
STAGE ONE:
STAGE TWO:
STAGE THREE:
|
EMOTE: Fragments of Arcstone plummet to the ground. (You have 20-seconds to avoid the falling rock locations... defined by three (3) red circle / decals on the ground in the immediate area.) EMOTE: The leaves around the grove rustle as creatures come to the aid of Xanzerok. (Three adds have spawned. Kill them ASAP.) EMOTE: Fragments of Arcstone plummet to the ground. (Rocks are falling, you have ~20-seconds to move out of the red ground auras / decals.) EMOTE: A howl echoes throughout the grove as houndlike manifestations begin to coalesce from the shadows of Player1 and Player2. (The two named Players need to to the edge of the event area to the southwest-ish so that the adds spawn away from the boss.) EMOTE: Xanzerok calls on the roots deep within the grove and the ground rumbles with their answer. (Move to the clear / safe area at the flower, ASAP.) EMOTE: The air around the grove becomes charged with energy and begins to swirl around. A storm is forming. (A Magical Storm has spawned. Avoid it.) EMOTE: Roots burst from the ground around the feet of Player 1, Player2, et cetera. (Adds have spawned due the named Players failing to move to the red flower.) |
||
|
ARCSTONE, SHATTERED ISLE - COLOSSUS OF SKYLANCE (Tier 2) From Black Jay in Arcstone, Shattered Isle, key word 'Large.' |
|||
|
Two storms move idly around on different edges of the play space. Several golems move about tossing rocks and magical ruins into one of the storms. BASIC STRATEGY:
STAGE ONE:
STAGE TWO:
STAGE THREE:
STAGE FOUR:
|
EMOTE: The colossus tosses a large stone into the air and it hovers heavily over Player. (Named Player needs to run away at least 125-range from main raid until the 'Boulder Slam' effect is gone / lands.) EMOTE: Skittering and odd crooning sounds can be heard even before the creatures making them teleport into the area. (Scrykin adds spawned.) EMOTE: A massive stone foot slams the ground creating a shockwave. (Stand up!) EMOTE: The Colossus glows and a layer of armored stone surrounds it. (Main tank, only, needs to drag The Colossus of Skylance into the 'red' magical storm until the buff is removed.) EMOTE: The storm tears away the stony protection of The Colossus of Skylance. (Buff removed, main tank take The Colossus of Skylance back to the main raid.) EMOTE: The Colossus glows and runes flow around it. (Main tank, only, needs to drag The Colossus of Skylance into the 'blue' magical storm until the buff is removed.) EMOTE: The storm tears away the runic protection of The Colossus of Skylance. (Buff removed, main tank take The Colossus of Skylance back to the main raid.) EMOTE: You feel your body crackle with power as it burns. (Get out of the magical storm!) EMOTE: You feel your skin turning to stone and fracturing before falling off. (Get out of the magical storm!) EMOTE: You fall under the shadow of a falling stone. (You have 10-Seconds to move out of the purplish-aura!
|
||
|
RUINED RELIC - ASHENBACK (Tier 2) From Gwork in Ruined Relic, key word 'large enough.' |
|||
|
Ashenback, like many in the area, has been "damaged" by the destruction of the Plane of Magic. It seems that the only thing to be done about it is to subdue him until the goddess herself can return and fix him. BASE STRATEGY:
STAGE ONE:
STAGE TWO: At 75% Ashenback starts to use, about every 140-Seconds, 'Laval Armor' (self buff Rune to 100% Damage for 1.9 Billion HP; and +3,500 Damage Shield). It fades once it has absorbed enough damage.
STAGE THREE:
|
EMOTE: A small puddle of flames breaks off from the great firestorm. (A stationary puddle of flames has appeared. Ignore it, but heal through it's spell attacks.) EMOTE: A firestorm appears, summoned by Ashenback's rage. (A 'Firestorm' magical storm has appeared. It roams the outer edge of the platform. Keep Ashenback away from it and generally ignore it..) EMOTE: Ashenback encases his body with lava. (Ashenback has runed himself. Either DPS through it, or drag Ashenback into a 'Frost Storm' to remove it.) EMOTE: Ashenback's growing rage spawns another firestorm. (Ashenback has spawned a second 'Firestorm,' that can roam closer to the raid.) EMOTE: A firestorm becomes unstable.(the second Forestorm is now subsceptible to cold based spells.) EMOTE: A firestorm falters and changes into something new. (A Firestorm has temporarily changed into a Frost Storm.) EMOTE: A frost storm smothers a puddle of flames. (The Frost Storm eliminated a puddle of flames.) EMOTE: A frost storm smothers Ashenback's laval armor. (A Frost Storm has removed the 'Laval Armor' buff from Ashenback.) EMOTE: The frost storm restabilizes back into a firestorm. (A Frost Storm has converted back into a Firestorm.) |
||
|
RUINED RELIC - SHAR'DRAHN (Tier 2) From Gwork in Ruined Relic, key word 'large enough.' |
|||
|
Shar'Drahn has lost his mind with the shattering of the plane. He has some unconscious control over the wild storms and as his anger and pain grows, they appear more often. BASE STRATEGY:
STAGE ONE: Shar'Drahn will attack.
STAGE TWO: At 90% Shar’Drahn starts using 'Lighting Breath of Shar`Drahn' about every 40-Seconds (Frontal AoE 650 HP DD with 10K Mana Drain.
STAGE THREE:
STAGE FOUR: At 60% 'Sheltering Stone' and 'Ethereal Rockfall' will begin and continue until the end of the event.
STAGE FIVE: 40% Shar’Drahn starts using 'Wing Surge' (AoE 600-Range 350K HP DD with a Knockback (15) and Push Up (10).
Defeat Shar’Drahn for the win (if an Elder Monolith is up, you can not kill Shar'Drahn until it is dead). |
EMOTE: Magic fluctuates again, and a storm remakes itself. (A Magical Storm has changed form.) EMOTE: Shar`Drahn's rage summons another storm. (A second Magical Storm has appeared..) EMOTE: You hear stones crash into each other in the air above the platform, the shockwave temporarily disperses the storms. ('Sheltering Stone' & "Ethereal Rockfall' are about to happen.) EMOTE: You are now your true self. (You got caught in a 'Twisted Duplicate' storm and have spawned an add.) EMOTE: Swirling magic strangles your voice and mind. (Get out of the Magical Storm!) EMOTE: A convection of magic shatters your mind. (Get out of the Magical Storm!) EMOTE: Swirling gravity pulls you in. (Get out of the Magical Storm!) EMOTE: The swirling magic of the storm burns you. (Get out of the Magical Storm!) EMOTE: The wild storm rearranges your body slightly. (You are in beneficial storm. No worries!) EMOTE: Stones fall from the ruins above you and slam into the platform. (You may want to move by the rock wall that has appreared, to protect from 'Wind Surge' attacks. |
||
|
THE VORTEX - TALLONGAST, THE EGG (Tier 3) From Archsage Feish in The Vortex, key word 'Large.' |
|||
|
Tallongast has been transformed, back into his egg form by the explosion. The Nanny has placed it here while they go out to get any other eggs they can find and bring to this temporary nursery. Many of those eggs are tainted and dangerous, and Tallongast is pretty unhappy about its new circumstance. BASE STRATEGY:
STAGE ONE: Tallongast the Egg attacks and four (4) moth adds at a time will spawn and continue to do so for the entire event.
STAGE TWO: At 88% Tallongast, the Egg will start using 'Swallow' the main tank (highest on aggro) (10-Second Stun). Thgis will continue for the rest of the event. The Nanny also begins to appear as Tallongast, the Egg losses health and drops off eggs (all are purplish in color) of various types, around the perimeter (as well as placing Player corpses in eggs to change the eggs).
Once enough eggs have been destroyed... and an path is cleared... take Tallongast, the Egg towards the outer edge of the event area (but not too close to the edge (so as not to tether Tallongast, the Egg).
STAGE THREE: At 57% three types non-aggro of 'Foodstuff' (root models) will start to spawn for every 10% Health of Tallongast the Egg, for the rest of the event.
Tallongast the Egg will also begin to target six (6) Players with a poison attack (for the rest of ther event).
Defeat Tallongast, the Egg for the win. |
EMOTE: The Tallongast Egg swallows its most hated foe, decides they are not tasty, and spits them to the ground. (Tallongast, the Egg 'swallowed' the main tank.) EMOTE: Tallongast injects incipient poison into Player, Player, and Player. Tallongast infests anti-antivenin into Player, Player, and Player. (Tallongast has poisoned six Players.) EMOTE: You feel poison growing in your body. (Get cured withing 6-Tics.) EMOTE: Poison explodes out of all of your pores. (You failed to get cured and now have a worse effect! Cure this one!) EMOTE: You feel powerful negative energy enter you. (Do NOT cure this effect.) EMOTE: Malicious venom flies from an ally and invades your body. (You got cured and should not have been. You now have a nastier non-curable 2-Tic DoT.) EMOTE: The Nanny appears with a huge number of eggs and places them around the edge of the platform. (The Nanny has placed eggs around the perimeter. Range / Pet kill them, ASAP.) EMOTE: The Nanny appears with several eggs and places them near the center of the platform.(The Nanny has placed eggs about the center area. Range / Pet kill them, ASAP.) EMOTE: The Nanny rescues one of your dead, placing it into a new, tainted egg. (The Nanny has crerated an egg from a Player corpse. Range / Pet kill it, ASAP..) EMOTE: Player is hit with a silk stringer. (The named Player has been rooted for 3-Tics.) EMOTE: The blood will not stop due to something in the moth's saliva. (You have been hit with non-curable a 6-Tic 651K HP DD... heals!) EMOTE: A gaseous explosion slams into you. (a bloated foodstuff got to Tallongast, the Egg and exploded.) EMOTE: Moths are atracted to your fireworks. (Moth adds incoming.) (Yes, 'atracted' it is currently spelled wrong in game... maybe use 'to your fireworks.' in case a correction is made?) EMOTE: Tallongast, the Egg, calls for snacks! ('Foodstuff' MoB's spawned and are incoming.) |
||
|
THE LABYRINTH OF SPITE - SPITETANGLE (Tier 3) From Kerina, Lost Soul in Labyrinth of Spite, key word 'Face it.' |
|||
|
Spitetangle is a manifestation of Spite. It twists and tangles all of your petty hatreds and dislikes. BASE STRATEGY:
STAGE ONE: Start the event by speaking to Archsage Feish (keyword: 'End').
Adds will include:
After each add type has appeared and / or Spitetangle is at ~76%, Stage Two will begin. STAGE TWO: Everything continues as noted, but two (2) more things get added to the mix:
Move to the next stage once Spitetangle hits 45%. STAGE THREE: Spitetangle will de-aggro and Vengeskein and Vengecoil will appear. Both are tethered (DON'T tether them).
Defeat Spitetangle for the win. |
EMOTE: The Spitetangle weaves poison around [Player] (A Green Aura has formed around the noted Players location. Move out of and / or avpoid the green aura.) EMOTE: Poison starts to swirl around you. (You need a posion cure.) EMOTE: You are doused with poison. (You need a poison cure.) EMOTE: You have taken [xxx] damage from Poisonous Explosion by a poisonous explosion. (You need a poison cure.) EMOTE: The Spitetangle shakes furiously. Creatures fly from its back and land nearby. (Adds spawned.) EMOTE: Tangles of spitethread weave themselves together, preparing to become living things.(twisted egg sacs have spawned somewhere in the hallways... go destroy them before they hatch.) EMOTE: The Spitetangle chooses victims and places them into a stone tangle somewhere in the sewer, sending away [Player] and [Player]. -(The two named Players have been banished into a Stonetangle Prison. Go destroy them to set the Players free.) EMOTE: A spider drops a web trap. (Avoid the trap. Rogues can disarm it and use them later on a risher add.) EMOTE: Strands of web go everywhere. You have the presence of mind to gather them up. These might be useful later. (A rogue has disarmed the web trap and now has it to use later on a rusher add.) EMOTE: An enemy breaks free from a makeshift web trap. (a rusher has been trapped by a rogue and reset to spawn point.) EMOTE: A creature of Spite jumps on your back. (You have taken significant damage.) |
||
|
THE LABYRINTH OF SPITE - ECHO OF HATE (Tier 3) From Kerina, Lost Soul in Labyrinth of Spite, key word 'Face it.' |
|||
|
Spitetangle must be defeated (see above) before this event can be undertaken (same raid, same zone). This raid is similar to the Group Mission, on steroids. This raid is very involved, so there is a lot to understand and pre-prepare for. BASE STRATEGY / PREPARATION:
EVENT AREA INFO: NORTH:
EVENT AREA INFO: SOUTH:
EVENT AREA INFO: EAST:
EVENT AREA INFO: WEST:
MAIN EVENT 100%:
MAIN EVENT 79%:
MAIN EVENT 59%:
MAIN EVENT 39%:
MAIN EVENT 19%:
FINAL STAGE - BACK TO 100%:
|
EMOTE: Creatures form out of pure hatred. (Four Gnome Adds.) EMOTE: The echo destroys the mystical candles and takes their magic to form its own creation. (An ooze spawned... avoid it.) EMOTE: Aggressive boiling wax churns and focuses on Player (Named Player needs to kite ooze away from raid, until it goes after another Player). EMOTE: A greedling stops and sniffs the air, holding its hand out. (Give 10 Platinum to a greedling.) EMOTE: A greedling, satiated with shiny coins, disappears. (a greedling has despawned.) EMOTE: The echo spews spite, forming it into physical creatures. (Three a spite forgatherer have spawned, assist and kill them ASAP.) EMOTE: ...has been slain by... (A Player has died and a death add has spawned... kill it ASAP). (ONLY applies in final phase.) EMOTE: The Echo burns with hatred of the weak and focuses it into one of the magical stones. (Click the East Crystal ASAP.) EMOTE: The Echo forgets its hatred of your weakness, for the moment. (East Crystal click success.) EMOTE: You are overcome with a sense of weakness in the face of power. (East Crystal click fail... an echo can hit harder.) EMOTE: The Echo starts to gather all of its self-loathing and focuses it into one of the magical stones. (Click the North Crystal ASAP.) EMOTE: The Echo's self-loathing recedes. (North Crystal click success.) EMOTE: The Echo expresses its self-hatred. (North Click fail.. an echo gained a 1.7 Billion HP rune.) EMOTE: The Echo roils with hatred for all that are not it. (Click the South Crystal ASAP.) EMOTE: The Echo's hatred of others is derailed momentarily. (South Crystal click success.) EMOTE: The Echo explodes with hatred of all that are not it. (South Crystal click fail... AoE 'Burn the Others' DoT incoming... a 5-Tic 451K HP / 10K Mana Drain DoT with 35% Snare). EMOTE: The Echo glares with rage at all of its opponents and focuses it into one of the magical stones. (Click the West Crystal ASAP.) EMOTE: The Echo's rage fades. (West Crystal click success.) EMOTE: The Echo's rage peaks. (West Crysal click fail... an acho can now Flurry.) EMOTE: The echo sends power away, off into the labyrinth. (an echo HP locked and Event rooms active, go defeat the next event.) EMOTE: The Dark Oppressor has appeared (East Dark Oppressor event active.) EMOTE: The Dark Oppressor realizes that it is the weakest creature in its small domain, and surrenders. (East Dark Oppressor defeated... an echo can now target low Hit Point Players... see event info to the left.) EMOTE: Not enough of the most common species confront the Dark Stranger, and so it cannot be harmed. (More designated properly illusioned Players need to be inside the South event.) EMOTE: The Dark Stranger is vulnerable, being surrounded by a proper sized group of the most common species. (South Dark Stranger active.) EMOTE: The Dark Stranger falls, but it is not forgotten. (South Dark Stranger defeated... an echo can now banish.) EMOTE: The Dark Maniac has appeared, devoted to showing you the depths of your hatred. (West Dark Maniac event active.) EMOTE: The Dark Maniac falls, but it is not forgotten. (West Dark Maniac defeated, an echo can now charm.) EMOTE: The Dark Flagellant has appeared and will defeat you by defeating himself. (North Dark Flagellant event active.) EMOTE: The Dark Flagellant, filled with health, fades away. (North Dark Flagellant event defeated.) EMOTE: The Echo recognizes the weakest among you: Player, Player, Player, and Player. (Four named Players, and the pre-designated 'savior' Players, need to to immediatley run to the pre-designated corners.) EMOTE: Your presence protects the weak, and you suffer for it. (Success as a savior / protector... see event details to left.) EMOTE: >>NEED EMOTE<< (North Dark Flagellant ascended... Echo has a new DoT and 'Ascended Pain' will now hit raid every 15-Seconds... see details to left.) EMOTE: The Echo sends some of those that are not like the others away into the labyrinth. (Improperly illusioned Players have been banished, bne ready for trash adds.) EMOTE: Boiling wax burns you painfully. (Get away from oozes!) EMOTE: The Dark Maniac invests its mania into Player. (Named Player has been temporarily charmed.) EMOTE: You lose control of yourself! (You have been temporarily charmed.) EMOTE: You have control of yourself again. (You are no longer charmed.) EMOTE: A spite forgatherer pulls spite from those around it and grows stronger and swifter. (a spite forgatherer has increased in Attack.) EMOTE: The pain you feel from your own failures is exquisite. (AoE 550 HP DD 'Ascended Pain' went out -- HEALS HEALS HEALS!). EMOTE: The Echo sends some of those that are not like the others away into the labyrinth. (Improperly illusioned Players have been banished, be ready for adds.) EMOTE: You become overwhelmingly tainted by spite. (You are dotted... range-fight a spiteling unless otherwsie designated.) EMOTE: An echo shakes its head, then grins. Good. The longer you live, the more suffering I can offer you and the angrier I will be. (Enrage timer started.)
|
||
BACK TO TOP OF CATEGORY BACK TO TOP OF PAGE
--------------------------------------------------------------------
Lore is from / based on Daybreak expansion release information, Producer's Letters, per Dev postings and / or Beta Forum Info.
|
SHATTERING OF RO Druzzil Ro was murdered, Solusek Ro is out for vengeance, and you are his target! He seeks to end the pact protecting mortals and is gaining allies quickly! Druzzil Ro is dead, and Solusek Ro demands vengeance! A cataclysmic explosion has shattered the Plane of Magic, and the only witness is Firiona Vie. Is she responsible? No one can be sure while she lies unconscious in the Plane of Growth. But the Burning Prince is done with waiting, for he has suffered his last indignity at the hands of careless mortals. His rage burns hotter than it has in centuries, and the planes themselves will feel his wrath! Now, with magic itself sundered and storms of unstable magical energy sweeping across both Norrath and the planes, Solusek seeks to end the pact that has protected mortals since their birth, and he’s already gained unexpected support. Rallos Zek, the God of War, and Innoruuk, the God of Hate, see much to gain for themselves in Solusek’s actions. Together, these three unlikely and exceedingly distrustful allies have brought their crusade to the Plane of Growth. But Tunare, Goddess of Growth, does not stand alone. Lord Mithaniel Marr, the Truthbringer, has taken to the field in defense of his longtime ally, and even Quellious, the Goddess of Tranquility, has arrived. However, Quellious remains neutral, aiding the injured on both sides while simultaneously seeking an alternative to this burgeoning planar war. |
|
|
Scarred Grove Like much of the Plane of Growth, the Scarred Grove was once an idyllic tapestry of rolling hills, babbling brooks, lush forests, and transcendent waterfalls that all manner of fauna and flora called home. That picturesque beauty and tranquil serenity has been shattered by the Burning Host’s brutal assault, spearheaded by Solusek Ro, Rallos Zek, and Innoruuk. Fortress walls erected, war camps constructed, and siege engines primed; the battlelines have been drawn as the Verdant Defenders, led by Tunare and Mithaniel Marr, seek to stop the Burning Host from pushing deeper into the Plane of Growth. As the Tree of Life burns, both forces call out for champions to take up arms in their name to bring a swift conclusion to this conflict. Which side will you choose? |
Candlemaker's Workshop This is the Candlemaker's Workshop. Here is where Brell comes to experiment with various waxes, scents, wicks, and other materials. He also makes creative and unusual candlestick and, well, candlefolk. To facilitate his work, most of the necessary resources naturally occur in the area, including a small welling of Clay of Cosgrove. Unfortunately, Solusek and Rallos came through here with their armies and tried to "convince" the lord of the Underfoot to agree to alter the pact. They have damaged a lot of the area, killed many candlefolk, and ruined a lot of the natural resources. Solusek and Rallos have since left by following a river up into the Plane of Growth, but many of their minions remain. Their goal is to hinder Brell and hopefully get him to give in and change the pact. The reality is that Brell has been paying little attention to their antics. Brell knows his minions well. He knows that the candlefolk aren't fully realized creatures, their lives are very short, and their deaths don't mean much to them. They are constantly reformed anyway. His gnolls and other warriors will fight in his defense, and the dwarves and gnomes will defend his workshop as long as he is there. And, in the end Brell can just go to another workshop and work on something else. But right now, he wants to work on candle-related projects, so he stays here. ....................................... In the vast lower mantle of Norrath lies a Candlemaker's Workshop belonging to Brell Serilis, Lord of the Underfoot. One of many secret sanctuaries dedicated to Brell's endless research, this once peaceful corner of the Underfoot has been disrupted by the Burning Host, which burned a path straight through it to reach the Plane of Growth. But the Underfoot is vast and mostly takes care of itself. So while the gods wage their war, Brell continues to tinker. But Brell always seems to know more about the happenings in and around Norrath than most realize, and he also worries for his candle folk, the original denizens he created in this part of the Underfoot, who are now at great risk due to the hostility of the remaining invaders. If any mortals happen to find their way to him, might Brell aid them in resolving these recent, cataclysmic events? Perhaps for a price. |
|
Arcstone, Shattered Isles This is Arcstone, Isle of Spirits in ruin. A massive explosion has destroyed the tower Skylance and the Relic. This magical explosion first sent shockwaves through the isle, breaking it into pieces, scorched the land, and then rained down pieces of the tower. The explosion occurred in or near the tower, blasting out in a northwestern direction. The isle has been broken up into nine pieces, three of which the players cannot reach. The land is inhospitable and the inhabitants have all gone mad. ....................................... Shattered by the explosion that killed Druzzil Ro, Arcstone, Shattered Isles has a familiar landscape scattered across multiple broken and scarred islands. Some are covered in lava while others have lush growth. Magic is broken, and the impossible is everywhere. Traversal of the islands requires swimming through lava, waterfalls, and the wild growth of vines. Death swept across this plane when the magical cataclysm that ripped it apart occurred. Many of those who survived have been driven insane, often as a direct result of the connection they shared with their shattered goddess. Can they be saved, or do they need to be mercifully ended? |
Ruined Relic Relic has been shattered. An explosion from one of the portals into Skylance has torn the Relic apart. It now floats in pieces, some too small to even see. Navigation is treacherous. Druzzil Ro's touch is missing -- a ship without its navigator. Tsikut, the only remaining sane creature left in Relic following the blast, is seeking an orderly investigation and restoration. However, scrykin and other planar creatures have been affected most dreadfully by the blast. They now find it difficult to persevere without sabotage from untrusting agents, or simply those seeking power for themselves, and new threats arise almost every day. The area itself is slowly being rebuilt, with its remaining residents seeking access to the broken pieces of the artifacts that remain, utilizing whatever chaotic magic they can wrangle. |
|
The Vortex The Vortex was created when [REDACTED] exploded in a room full of powerful Tears of Veeshan. The [REDACTED] had enough power to trigger the Tears of Veeshan, releasing an explosion that tore the entire Plane of Magic to shreds. Chunks of Skylance and Relic fell to slam into Arcstone below. But the most unusual effect of the explosion was to rip open the doors. These doors are portals to extra-dimensional spaces that Druzzil Ro and her key minions used to store, keep, or imprison all sorts of strange things. Some of these extra-dimensional spaces themselves are strange places (perhaps the inside of a meteor someplace in space, or a plane that is completely full of marshmallows) that could contain or even be made of just about anything. When these spaces were violently exploded out into the Plane of Magic, and much of what players will see in the Vortex comes from those places. ....................................... The Vortex is chaos. Arcstone, Shattered Isles, and Ruined Relic are all afflicted by magic storms. But Vortex is a magic storm made manifest. Cloth is solid. Mechanical tentacles grow in the sky. Feathers swirl about, ending in a titanic nest. Water is as hard as steel. Creatures were born of this chaos. Each resembles the area they live in. Butterflies made of cloth, rainbow colored vultures, octopi made of metal, and lizards that swim like fish. Can Norrathians find out more about the cause of Druzzil Ro's death in this chaos? |
Labyrinth of Spite From the descent of an eternal staircase, a birds-eye view is granted of an expansive and treacherous labyrinth situated in permanent twilight. Spite-tainted drachnids, spiders, Teir`Dal, and a haunted gnome-like people named the Teir`Haeth patrol and guard the various prison cells dotted throughout the endless halls. The prisoners aren't here for justice, as the Tribunal may dole out, but for the amusement of the mistress of this demiplanar realm. Such amusement has been dragged in the form of the high-profile prisoner now raised high above the center of the labyrinth, hoisted in a private cell. Whoever it is has been getting special attention from the shadows. Should they be conscious enough, they will repeatedly see the futility of the adventurers daring to come to their rescue. For any prisoners who do manage to escape the grasp of their captors, they may not be all there, or all they had come to this realm as, roaming as zombie-like or semi-lucid husks. Some may even trip their way to the lower levels, to be lost in the secondary labyrinth of sewers. |
BACK TO TOP OF CATEGORY BACK TO TOP OF PAGE
--------------------------------------------------------------------
Recognitions and credits for all involved with developing and creating EverQuest, for the current and past expansions, can be seen by clicking the 'Credits' button at the bottom of the Server Select Screen and then viewing the 'Current Expansion' or the 'Previous Expansions' tab.
They can also be found in your EverQuest Directory (credits_current.txt & credits_previous.txt).
A huge thank you to all involved!

.
If you note any errors, misspellings, item name errors, misinformation or anything that needs addressing on this page -- PLEASE let me know via an in-game EQ Message (Bonzz on the Bertoxxulous server), or post on Bonzz's Discord Server!
This Page Last Updated August 6, 2026.
This fan site is created and provided free (uncompensated, no ads, no sponsors, no registration / log-in), by Bonzz of Bertoxxulous. Images / graphics / sounds on this web site are in-game (EverQuest) captures, originate from Sony / Darkpaw / Daybreak Games (EverQuest) and / or with permission from others (if any). Some graphics may be modified (re-sized, cropped, etc.) from their original form. Any pages that play sounds / music, are intentionally set at low volume. Most of them are under two (2) minutes or less, and should play once and then stop. If any sound / music continues to loop (play over and over), let me know! EverQuest is copyright / trademark / owned / operated by Darkpaw Games, which is owned / operated by Daybreak Games, which is owned / operated by Enad Global 7.
ACHIEVEMENT CATEGORIES & QUICK LINKS
Achievements listed in the below sections are not necessarily listed in alphabetical order. They are generally listed in the order seen in the game (at the time they were added to the lists below). Use Control-F to "Find" a specific achievement you may be looking for.
All of the the below achievements should apply to all classes (they are not class specific).
| SUB-CATEGORY | ACHIEVEMENT COUNT | ACHIEVEMENT POINTS |
| General | 10 | 560 |
| Exploration | 6 | 60 |
| Special | 1 | 35 |
| Quests | 12 | 220 |
| Missions | 20 | 220 |
| Raids | 52 | 860 |
| Hunter | 9 | 270 |
| Collections | 33 | 450 |
| TOTALS | 132 | 2,675 |
EXPANSION INFORMATION EXPANSION INCLUSIONS PRE-RELEASE EVENT NEW STUFF
ACHIEVEMENTS ALTERNATIVE CURRENCY ARMOR SETS CHASE LOOT GAME CREDITS
LORE MERC GEAR ORNAMENTS SETS PROGRESSIVE ITEM RAID INFO & STRATS
SPECIAL ITEM(S) SPELLS, DISCIPLINES & SONGS STAT FOOD & DRINK TRADESKILL RECIPES ZONES LIST
PREVIOUS EXPANSION BACK TO MAIN ACHIEVEMENTS PAGE NEXT EXPANSION
--------------------------------------------------------------------
Shattering of Ro was the 32nd expansion of EverQuest, released December 2, 2025.
Players were pleased to see that the raid count was increased back up to the traditional nine (9) raids, but there were still only four (4) Group Missions (traditionally, there were eight (8) group missions). The Raid events were released (activated) in January 2026 (Tier 1), February 2026 (Tier 2) & March 2026 (Tier 3).
Other than via a portal / spell, access into this expansion is from The Wakening Lands (/waypoint 500, -1045, -20... a burning tree beside the entrance to the Plane of Growth). There is also a connection to Arcstone, Shattered Isles from West Freeport, but is locked by progression (Candlemaker's Workshop Mercenary & Partisan).
In the January 2026 Patch Tsikut's Crystallized Magic (a click portal to Ruined Relic) was added to the game, due popular demand. You can get it from Tsikut in Ruined Relic (key word 'traveled'), but only if you have the proper progression that would allow you to get to and speak to Tsikut.
--------------------------------------------------------------------
There was a Pre-Release Event in The Wakening Lands. There was an NPC (a cowering raider) who would talk to you about magical storms, but gave no task / quest. In the zone hidden among the many trees, there were four (4) variant 'Magical Storms.' If you stood in one, you would get a song window effect that was a short duration Air, Earth, Fire or Water illusion (depending on which Magical Storm you stood in). Hailing a cowering raider afterwards (with or without an illusion) resulted in the same chat spam. No reward (no achievement, no item, no tile, no XP.... nothing). It has been suggested that a more complete event was planned but was then delegated into 'just flavor' due time constraints. At least it directed Players to one of the gateways for this expansion (the Scarred Grove zone line is in The Wakening Lands) and 'previewed' the new 'magical storms.'
--------------------------------------------------------------------
For more changes, modifications, fixes and additions that happened during this expansion, see here: EQ Timeline.
--------------------------------------------------------------------
The expansion was sold in four (4) versions: Family & Friends ($249.99); Premium ($139.99); Collector's ($89.99); and Standard ($34.99).
PRE-ORDER: If you Pre-Ordered (any version) you got (3) Shattered Longsword Ornament (convertible to 31 total ornament variations). You also got access to Beta, as a bonus.
STANDARD: This version did not include any Bonus Items.
COLLECTOR'S: This version included: Contract of Candlefolk (Mercenary type); Tunare's Lily (Placeable Personal Portal); (2) Goblet of Shared Adventure (4-Hour +50% XP for your Group); Painting: Shattering of Ro (Placeable Painting); (2) Stormrider's Rucksack (42-Slot 100% Bag); Runed Strongbox (60-Slot Crate for your bank or your property); Spectral Horse Saddle (Mount); & Metamorph Wand - Cloth Butterfly (pet illusion / familiar).
PREMIUM: This version included: Contract of Candlefolk (Mercenary type); Tunare's Lily (Placeable Personal Portal); Mithaniel Marr's Strategy Table (Placeable Guild Portal); (2) Goblet of Shared Adventure (4-Hour +50% XP for your Group); Painting: Shattering of Ro (Placeable Painting); (2) Stormrider's Rucksack (42-Slot 100% Bag); (2) Runed Strongbox (60-Slot Crate for your bank or your property); Spectral Horse Saddle (Mount); Metamorph Wand - Cloth Butterfly (pet illusion / familiar); (10) Perfected Augmentation Distiller; Giant Bee Saddle (Mount); Metamorph Wand: Magic Storm (pet illusion / familiar); & Visage of the Candlefolk (Illusion);
FAMILY & FRIENDS: This version included: Contract of Candlefolk (Mercenary type); Tunare's Lily (Placeable Personal Portal); Mithaniel Marr's Strategy Table (Placeable Guild Portal); (4) Goblet of Shared Adventure (4-Hour +50% XP for your Group); Painting: Shattering of Ro (Placeable Painting); (3) Stormrider's Rucksack (42-Slot 100% Bag); (2) Runed Strongbox (60-Slot Crate for your bank or your property); Spectral Horse Saddle (Mount); Metamorph Wand - Cloth Butterfly (pet illusion / familiar); (10) Perfected Augmentation Distiller; Metamorph Wand: Magic Storm (pet illusion / familiar); Giant Bee Saddle (Mount); Visage of the Candlefolk (Illusion); Tradable: Shattering of Ro (standard expansion); Tradable: Level 100 Heroic Character; Tradable: Spectral Horse Saddle (Mount); Tradable Giant Bee Saddle (Mount); Tradable: Runed Strongbox (60-Slot Crate for your bank or your property); Overseer Agent Pack (fifteen (15) Common Overseer Agents & two (2) Uncommon Overseer Agents); (5) Rodcet Nife Heritage Crate (Marketplace Item); and a Race Change Scroll (Marketplace Item).
BETA: Players who participated in Beta and earned enough 'Beta Tokens' were awarded a Metamorph Wand - Broom.
|
Metamorph Wand: Cloth Butterfly (Expansion Purchase Item) (Video) |
(Expansion Purchase Item) (Video) |
Mithaniel Marr's Strategy Table (Expansion Purchase Item) (Video) |
(Expansion Purchase Item) (Video) |
|
(Expansion Purchase Item) (Video) |
(Expansion Purchase Item) (Video) |
(Expansion Purchase Item) (Video) |
(Expansion Purchase Item) (Video) |
|
Contract of Candlefolk (Tank Option) (Expansion Purchase Item) (Video) |
Contract of Candlefolk (Caster DPS Option) (Expansion Purchase Item) (Video) |
Contract of Candlefolk (Melee DPS Option) (Expansion Purchase Item) (Video) |
Contract of Candlefolk (Healer Option) (Expansion Purchase Item) (Video) |
|
(Pre-Order Bonus) (Video) |
(Pre-Order Bonus) (Video) |
(Pre-Order Bonus) (Video) |
Shattered Tower Shield Ornament (Pre-Order Bonus) (Video) |
|
(Pre-Order Bonus) (Video) |
(Pre-Order Bonus) (Video) |
Shattered Arcane Staff Ornament (Pre-Order Bonus) (Video) |
(Pre-Order Bonus) (Video) |
|
(Pre-Order Bonus) (Video) |
(Pre-Order Bonus) (Video) |
(Pre-Order Bonus) (Video) |
(Pre-Order Bonus) (Video) |
|
Shattered Lucern Hammer Ornament (Pre-Order Bonus) (Video) |
(Pre-Order Bonus) (Video) |
Shattered Injection Dagger Ornament (Pre-Order Bonus) (Video) |
(Pre-Order Bonus) (Video) |
|
Shattered Spiked Mace Ornament (Pre-Order Bonus) (Video) |
Shattered Short Spear Ornament (Pre-Order Bonus) (Video) |
(Pre-Order Bonus) (Video) |
(Pre-Order Bonus) (Video) |
|
Shattered Ritual Spear Ornament (Pre-Order Bonus) (Video) |
Shattered Flanged Mace Ornament (Pre-Order Bonus) (Video) |
(Pre-Order Bonus) (Video) |
(Pre-Order Bonus) (Video) |
|
(Pre-Order Bonus) (Video) |
(Pre-Order Bonus) (Video) |
(Pre-Order Bonus) (Video) |
(Pre-Order Bonus) (Video) |
|
(Pre-Order Bonus) (Video) |
(Pre-Order Bonus) (Video) |
(Pre-Order Bonus) (Video) |
|
|
(Chain Video) (Cloth Video) (Robe Video) Fractured Arcane Ornament Sets (Group Ornaments) |
x x x x Chain (Video) Cloth (Video) Leather (Video) Plate (Video) Robe (Video) (Group Vendor Sold Ornaments) |
Chain (Video) Cloth (Video) Leather (Video) Plate (Video) Robe (Video) (Raid Ornaments) |
(Achievement) (Video) |
|
(Achievement) (Video) |
|
|
(Achievement) (Video) |
--------------------------------------------------------------------
--------------------------------------------------------------------
There were new recipes for every skill.
The recipe books, along with certain new and old tradeskill items, are sold by an overwhelmed druid and an overburdened squire in Scarred Grove (both are on Find).
--------------------------------------------------------------------
This expansions Player crafted stat food and stat drink is Uncanny Lemon-Iced Spiced Apple Cake & Uncanny Ambrosial Cocktail.
--------------------------------------------------------------------
--------------------------------------------------------------------
--------------------------------------------------------------------
Depending on which gear set you are making, they can require one (1) or more other items that are either dropped, crafted or sold by vendors.
These items are combined inside a combine container (which is also dropped or crafted) to make the actual armor.
As a note, weapons and non-visible items can also be crafted in similar fashion (as noted below).
The armor sets and the materials needed are:
--------------------------------------------------------------------
The Unbroken Mask of the Vortex is a progressive Face item, attached to Experience, Quests, Missions, Raids & Achievements.
You craft / acquire the first version via a quest.
The quest series is outlined here.
--------------------------------------------------------------------
There is new Level 125-Required 'Opulent' Mercenary Gear.
It is a semi-rare drop from most any MoB in any zone.
--------------------------------------------------------------------
New 'Unbound Radiance' Chase loot (aka Rare Loot aka Ultra Rare loot) was added to the game.
|
Adroit Amice of Unbound Radiance Adroit Belt of Unbound Radiance Adroit Cloak of Unbound Radiance Adroit Earring of Unbound Radiance Adroit Idol of Unbound Radiance Adroit Mask of Unbound Radiance Adroit Necklace of Unbound Radiance Adroit Ring of Unbound Radiance Arcane Staff of Unbound Radiance Athame of Unbound Radiance Axe of Unbound Radiance Baton of Unbound Radiance Bow of Unbound Radiance Brilliant Amice of Unbound Radiance Brilliant Belt of Unbound Radiance Brilliant Charm of Unbound Radiance Brilliant Cloak of Unbound Radiance Brilliant Earring of Unbound Radiance |
Brilliant Idol of Unbound Radiance Brilliant Mask of Unbound Radiance Brilliant Ring of Unbound Radiance Broadsword of Unbound Radiance Censer of Unbound Radiance Compound Bow of Unbound Radiance Fighting Staff of Unbound Radiance Flanged Mace of Unbound Radiance Foil of Unbound Radiance Great Axe of Unbound Radiance Great Mace of Unbound Radiance Greatsword of Unbound Radiance Guardian's Mask of Unbound Radiance Halberd of Unbound Radiance Hammer of Unbound Radiance Katar of Unbound Radiance Kite Shield of Unbound Radiance Knife of Unbound Radiance Mace of Unbound Radiance |
Adroit Charm of Unbound Radiance Secure Cloak of Unbound Radiance Secure Necklace of Unbound Radiance Short Spear of Unbound Radiance Spear of Unbound Radiance Spiked Shield of Unbound Radiance Summoner's Earring of Unbound Radiance Sword of Unbound Radiance Tower Shield of Unbound Radiance Vigorous Amice of Unbound Radiance Vigorous Belt of Unbound Radiance Vigorous Charm of Unbound Radiance Vigorous Earring of Unbound Radiance Vigorous Idol of Unbound Radiance Vigorous Necklace of Unbound Radiance Vigorous Ring of Unbound Radiance Wand of Unbound Radiance War Sword of Unbound Radiance |
--------------------------------------------------------------------
The Hero's Forge Ornament sets for this expansion were:
-------------------------------------------------------------------
The starting zone (Scarred Grove) can be accessed via The Wakening Lands (a tree on top of the center building by the Plane of Growth portal); or via a click portal that came with the some of the expansion packages; or via the Guild Hall Portal.
|
Arcstone Shattered Isles (Entrance from Candlemaker's Workshop is blocked until you complete Partisan of Candlemaker's Workshop and / or Mercenary of Candlemaker's Workshop ). Candlemaker's Workshop Labyrinth of Spite |
Ruined Relic Scarred Grove The Vortex |
BACK TO TOP OF CATEGORY BACK TO TOP OF PAGE
--------------------------------------------------------------------
NOTE: Any rewards highlighted in YELLOW might be worth pursuing, due the fun factor, benefit or usefulness of the reward (you decide).
NOTE: Some miscellaneous “hints” may also be included in PURPLE. These hints are intended to enhance / clarify the "how to" for accomplishing the achievement.
NOTE: Anything in RED text is either an informational or data / details that are not fully verified. If you can verify or provide correct information, please do (see end of page)!
NOTE: Items noted as a "REWARD" are items granted from the achievement, itself. Items listed as "ACQUIRED" are unique item's that can be / are / should be acquired along the way, towards completing the related achievement, but are not actually a reward granted from the achievement itself. In fact, the achievement may even be for acquiring said item. Additionally, only the more 'unique' Achievement awards are noted below... 'common' or 'generic' Achievement Rewards like Alternate Advancement points, Character Experience & Coin, are not noted in the reward options below.
|
NAME |
POINTS | NOTES | REWARD(S) |
|
Master of Shattering of Ro xxxxxx |
100 | Complete the two (2) listed Achievements. | N / A |
|
Arcane Arbiter 122025 |
60 | Complete the two (2) listed Achievements. |
Mount: Armored Bee Harness (see above) Titles: 'Arcane Arbiter' & 'The Arcane Arbiter' Suffices: 'Arcane Arbiter' & 'the Arcane Arbiter' |
|
Stormslayer 020626 |
60 | Complete the three (3) listed Achievements. |
Stormslayer's Chest (52-Slot 100% Bag) Titles: 'Stormslayer' & 'The Stormslayer' Suffices: 'Stormslayer' & 'the Stormslayer' |
|
Explorer of Shattering of Ro 120725 |
20 | Complete the six (6) listed Achievements. |
If you don't have one all ready, you should get a Journeyman's Compass. Click the Journeyman's Compass to gain another level of the Journeyman's Speed Alternative Advancement (if it isn't all ready maxed out). |
|
Champion of Shattering of Ro 121425 |
40 |
Complete the twelve (12) listed Achievements (Mercenary & Partisan tasks for each zone.) |
N / A |
|
Paragon of Shattering of Ro 122025 |
40 | Complete the four (4) listed Achievements. | |
|
Challenger of Shattering of Ro 021526 |
60 | Complete the four (4) listed Achievements. | Unlocks the ability to convert the Windstone of Virtue, Fretful Picker, Honed Gem of Unraveling Order and the Sharpened Gem of Unraveling Order. |
|
Conqueror of Shattering of Ro 081026 |
60 | Complete the nine (9) listed Achievements. | N / A |
|
Vanquisher of Shattering of Ro xxxxxx |
80 | Complete the nine (9) listed Achievements. | Arcane Tome (+180 Overcaps Aug). |
|
Storm Chaser xxxxxx |
40 | Complete the three (3) listed Achievements. |
Brazier of Magic (Trophy) (see above) Storm Chaser's Backpack (48-Slot 100% Bag) Title Prefix, 'Storm Chaser' and Title Suffix 'Storm Chaser.' |
BACK TO TOP OF CATEGORY BACK TO TOP OF PAGE
--------------------------------------------------------------------
|
NAME |
POINTS | NOTES |
|
Scarred Grove Traveler 120225 |
10 | Go to the noted zone. |
|
Candlemaker's Workshop Traveler 120225 |
10 | Go to the noted zone. |
|
Arcstone, Shattered Isles Traveler 120325 |
10 | Go to the noted zone. |
|
Ruined Relic Traveler 120325 |
10 | Go to the noted zone. |
|
The Vortex Traveler 120625 |
10 | Go to the noted zone. |
|
Labyrinth of Spite Traveler 120725 |
10 | Go to the noted zone. |
BACK TO TOP OF CATEGORY BACK TO TOP OF PAGE
--------------------------------------------------------------------
|
NAME |
POINTS | NOTES | REWARD(S) |
|
Artisan of Shattering Ro xxxxxx |
35 | Complete the seven (7) part quest series from Apprentice Mage Sarcrynn in Arcstone, Shattered Isles. |
Acquired: Unbroken Mask of the Vortex. The quest series is outlined here. |
BACK TO TOP OF CATEGORY BACK TO TOP OF PAGE
--------------------------------------------------------------------
|
NAME |
POINTS | NOTES |
|
Mercenary of Scarred Grove 120225 |
30 | Complete the six (6) listed tasks / quests. |
|
Partisan of Scarred Grove 120225 |
25 | Complete the five (5) listed tasks / quests. |
|
Mercenary of Candlemaker's Workshop 120225 |
15 | Complete the three (3) listed tasks / quests. |
|
Partisan of Candlemaker's Workshop 120325 |
15 | Complete the three (3) listed tasks / quests. |
|
Mercenary of Arcstone, Shattered Isles 120525 |
15 | Complete the three (3) listed tasks / quests. |
|
Partisan of Arcstone, Shattered Isles 120525 |
15 | Complete the three (3) listed tasks / quests. |
|
Mercenary of Ruined Relic 120625 |
20 | Complete the four (4) listed tasks / quests. |
|
Partisan of Ruined Relic 120625 |
15 | Complete the three (3) listed tasks / quests. |
|
Mercenary of The Vortex 120625 |
15 | Complete the three (3) listed tasks / quests. |
|
Partisan of The Vortex 120725 |
15 | Complete the three (3) listed tasks / quests. |
|
Mercenary of Labyrinth of Spite 121425 |
20 | Complete the four (4) listed tasks / quests. |
|
Partisan of Labyrinth of Spite 121425 |
20 | Complete the four (4) listed tasks / quests. |
BACK TO TOP OF CATEGORY BACK TO TOP OF PAGE
--------------------------------------------------------------------
All of the Mission Achievements, that do not credit until the Chest is opened, can be acquired via a Task Add. Task Added Players will get credit when the mission chest is opened. They will get credit no matter where they are. They do not have to be in zone.
|
NAME |
POINTS | NOTES | REWARD(S) |
|
Hero of Candlemaker's Workshop From Defense Unit CDL in Candlemaker's Workshop, keyword 'Accept.' 121625 |
10 |
Complete the listed Mission. Base Strategy: Say ready to Defense Unit CDL to zone into the instance. Start the event by hailing and saying 'Destroy to Waxwork Abolishion. Every 20% Waxwork Abolishion will split into adds. Have the tank gather the adds together and face them away from the rest of the group. Kill one (1) of the adds and Waxwork Abolishion will reform after 15-seconds have passed (the rest of the split adds go poof). Repeat until Waxwork Abolishion is defeated. Defeated adds give their ability, to Waxwork Abolishion for the rest of the event (Waxwork Igniter = Directional DD; Waxwork Lancer = Directional DD; Waxwork Combuster = DoT; Waxwork Trapper = DoT / Slow; & Waxwork Burster = PB AoE. |
+1 Hero's Fortitude AA +1 Hero's Vitality AA |
|
Savior of Candlemaker's Workshop: Waxwork Abolishion 010826 |
15 | Complete the three (3) listed Achievements. |
+1 Hero's Fortitude AA +1 Hero's Resolution AA +1 Hero's Vitality AA |
|
Waxwork Abolishion: Wax Removal 121625 |
10 |
Kill all adds before the killing Waxwork Abolishion. Kill ALL spawned adds BEFORE killing Waxwork Abolishion. This means the 'reinforcement' adds (a waxwork ambusher, a waxwork soldier & a waxwork zealot) as well as any a waxwork globule adds. The split adds are not included (see above). |
N / A |
|
Waxwork Abolishion: Wax Denial 121625 |
10 |
Do not let any waxwork globules to spawn. During the event, a red decal / circle will appear (EMOTE: 'The Waxwork Abolishion ignites and launches a barrage of hot wax globs high into the air.'). Have at least one (1) Player stand in the decal / aura to prevent any a waxwork globule spawning. |
N / A |
|
Waxwork Abolishion: The Final Flicker 010826 |
10 |
Kill all five (5) split adds. During this event, Waxwork Abolishion will split into adds every 20% (see above). Make sure they are ALL defeated before killing Waxwork Abolishion. To do this, balance them down. When one (1) of them dies, you have 15-Seconds to kill as many as the others as you can before they reform into Waxwork Abolishion. Once they are killed, they stay dead (they don't come back) and reduce the HP of the reformed Waxwork Abolishion. They ALL need to be killed by the last (3rd) split. I suggest to kill at least one (1), then (2) and then (2). |
N / A |
|
Hero of Arcstone, Shattered Isles From Black Jay in Arcstone Shattered Isles, key word 'Smaller.' 121525 |
10 |
Complete the listed Mission. Base Strategy: Say 'Ready to Black Jay, to zone into the instance. Start the event by saying 'Now' to Torm the Golden, who is right near where you zone in at the broken bridge. Next, a runic worker and a stony worker will come running to attack you. Kill them both (you can remove their buffs by taking them into one of the magical storms, if you need to). Once they are dead The Colossus of Skylance will aggro. He can cause you to Feign Death, so stand back up ASAP! Adds will spawn along the way (a bedeviled scrykin, a crazed scrykin and an absent scrykin) ), so be ready for them (leave an absent scrykin alone.... they don't aggro unless you do something to them)! They will despawn when The Colossus of Skylance dies... so kill them or not. You need to at least control them (off tank or have the tank aggro them all) until The Colossus of Skylance is dead. Open a glowing chest (nearby) for loot. |
+1 Hero's Fortitude AA +1 Hero's Vitality AA |
|
Savior of Arcstone, Shattered Isles 010426 |
15 | Complete the three (3) listed Achievements. |
+1 Hero's Fortitude AA +1 Hero's Resolution AA +1 Hero's Vitality AA |
|
Colossus: The Sky is Falling (Group) 010526 |
10 |
No group member can be hit by Skyfall debris. During this event, one (1) Player, at a time, will get an emote. A reddish ground aura will appear around / near the Player named in the emote. Everyone needs to move out of that aura before it triggers (you have about 15-Seconds to do this). No one can fail this, at all. |
EMOTE: The Colossus tosses a large stone into the air and it hovers heavily over Player. FAIL EMOTE: A huge chunk of stone slams into the ground. |
|
Colossus: Crack the Defenses (Group) 010526 |
10 |
Don't allow The Colossus have both armors at the same time. Keep The Colossus in one (1) of the 'Magic Storms' for the entire battle. This is not as simple as it sounds, as the 'Magic Storms' continuously move, so the main tank has to keep dragging The Colossus about to keep him inside the 'Magic Storm.' |
EMOTE (Armor Buff): The Colossus glows and runes flow around it. EMOTE (Adds): A massive stone foot slams the ground creating a shockwave. EMOTE (Adds): Skittering and odd crooning sounds can be heard even before the creatures making them teleport into the area. |
|
Colossus: Full Defense (Group) 121525 |
10 |
Make sure that always has at least one armor, at all times. The Colossus of Skylance has buffs that can be removed by taking it into one of the magical storms. Don't fight him in either Magical Storm. |
N / A |
|
Hero of Ruined Relic From Gwork in Ruined Relic, key word 'xxxxx.' 122025 |
10 |
Complete the listed Mission. Base Strategy: Say 'Ready' to Gwork to zone in. Say 'xxx' to Gwark (on the ramp near where you zone in) to start the event. he best way to defeat this mission is to go full burn on Shar'Drahn at about 77% while fully ignoring the aura / decals and adds. Adds will appear but do not attack right away. Kill Shar'Drahn fast enough and you will not many adds to heal through. Take a good tank, a good healer and good DPS. Otherwise...
|
+1 Hero's Fortitude AA +1 Hero's Vitality AA |
|
Savior of Ruined Relic 021526 |
15 | Complete the three (3) listed Achievements. |
+1 Hero's Fortitude AA +1 Hero's Resolution AA +1 Hero's Vitality AA |
|
Shar'Drahn: Heads Up (Group) 122025 |
10 |
No one can be hit by flying rocks. During this event, there will be about three (3) large round boulders that drop from the sky. If they hit you, you will suffer damage! Before they drop, red circles / decals will appear on the ground. Everyone (not just the emoted player) must avoid those locations, every time! |
EMOTE: Fragments of Arcstone plummet to the ground. (You have 20-seconds to avoid the falling rock locations.) |
|
Shar'Drahn: Unduplicated (Group) 122025 |
10 |
No one can be copied by a storm. During this event, there are 'magical storms' that roam about. One storm is light-blue in color. This storm must be avoided by everyone... otherwise it will 'duplicate' any Players inside it into a 'twisted' add (a twisted duplicate). These adds are nasty and can / will wipe the group. |
N / A |
|
Shar'Drahn: Only The Young (Group) 021526 |
10 |
Do not allow any Elder Monolith to be summoned. At least one (1) Player must get into the aura / decal, every time it appears, to prevent the Elder Monolith add from spawning (as a note, other easier adds will spawn, however). |
EMOTE: Shar'Drahn places a call to the storm for assistance. |
|
Hero of Labyrinth of Spite From Kerina, Lost Soul in Labyrinth of Spite, key word 'Group.' 122025 |
10 |
Complete the listed Mission. Base Strategy: This event involves an echo as the primary target. Before starting, everyone needs to be illusioned as the same race (place an illusion campfire or use any other method available to the entire group).
|
+1 Hero's Fortitude AA +1 Hero's Vitality AA |
|
Savior of Labyrinth of Spite 010726 |
15 | Complete the three (3) listed Achievements. |
+1 Hero's Fortitude AA +1 Hero's Resolution AA +1 Hero's Vitality AA |
|
Echo of Hate: Give in to Greed (Group) 010726 |
10 |
Get rid of all the greedlings by giving them what they want. During this event, there is only one (1) a greedling, despite the plurality used in the achievement. When a greedling appears, do not over DPS / kill it. Instead... let the tank hold aggro and solo it down. At three 93) different times a greedling will go inactive with an emote. When this happens, give 100 Platinum to a greedling. The third time you do this, a greedling will despawn. EMOTE: A greedling stops and sniffs the air, holding its hand out. |
EMOTE: A greedling stops and sniffs the air, holding its hand out. (Give 100 Platinum to a greedling.) |
|
Echo of Hate: What it Wants (Group) 010726 |
10 |
Trigger the Dark Flagellant first and allow it to ascend. During this event, when it comes time to clicking one of the four 'crystals,' click the North crystal first, where you will encounter Dark Flagellant. Do not DPS / kill Dark Flagellant. As suggested by his name, Dark Flagellant is damaging himself. Dark Flagellant will drop 3%+ in health every tic (6-seconds). This achievement involves just standing there, until Dark Flagellant kills himself. Just be sure to keep the group healed because the damage is not just to Dark Flagellant, but also to the group ('Feeling What I Feel,' a 15.2K Base Damage AoE). |
N / A |
|
Echo of Hate: Unfocused (Group) 010726 |
10 |
Don't allow the Echo to focus its hatred into any magical stones. During the final phase of this event, there will emotes indicating the need to click one (1) of the 'switches.' Follow the emotes to get this achievement. Failing to click the correct switch will cause a temporary buff / boost for an echo (see right). Successful clicks will stop said effects. |
EMOTE: The Echo burns with hatred of the weak and focuses it into one of the magical stones. (East, fail and an echo gets bigger and does more damage). EMOTE: The Echo roils with hatred for all that are not it and focuses it into one of the magical stones. (South, fail and an echo gets a PB AoE that is a snare, HP Damage and Mana Drain) EMOTE: The Echo glares with rage at all of its opponents and focuses it into one of the magical stones. (West, fail and an echo gets a high flurry rate) EMOTE: The Echo starts to gather all of its self loathing and focuses it into one of the magical stones." (North, fail and an echo will drop in HP, but gets a Rune / Shield that is 3X the amount of HP dropped... so it is really like a gain of HP, that a loss). |
BACK TO TOP OF CATEGORY BACK TO TOP OF PAGE
--------------------------------------------------------------------
|
NAME |
POINTS | NOTES |
|
Conqueror of Candlemaker's Workshop: Waxwork Abolishion 010826 |
20 | Defeat the noted Raid event. |
|
Vanquisher of Candlemaker's Workshop: Waxwork Abolishion 012226 |
30 | Complete the three (3) listed Achievements. |
|
Waxwork Abolishion: Waxing Intensity 012226 |
10 |
Allow five (5) or more waxwork globules to spawn. During this event, while Waxwork Abolishion is active, three (3) ground auras (decals) will periodically appear around Waxwork Abolishion. Leave at least one (1) of them unoccupied by Players to cause a waxwork globule add to spawn. Do this until five (5) a waxwork globule have spawned (and kill them). |
|
Waxwork Abolishion: Wax Free Zone 011526 |
10 |
Do not allow any waxwork globules to spawn. During this event, while Waxwork Abolishion is active, three (3) ground auras (decals) will periodically appear around Waxwork Abolishion. EMOTE: 'The Waxwork Abolishion ignites and launches a barrage of hot wax globs high into the air.' Be sure that at least five (5) Players quickly move into each ground aura (decal) to prevent any a waxwork globule from spawning. This must be done every time the ground auras (decals) appear. |
|
Waxwork Abolishion: Snuffed Out, Fired Up 011526 |
10 |
Kill all five (5) waxwork splits throughout the fight. At certain points during this event, Waxwork Abolishion will split into as many as five (5) mini versions of itself. Killing any one (1) of them will cause the others to reform into Waxwork Abolishion after about 15-Serconds. Waxwork Abolishion only splits four (4) times, but there are five (5) of them. So you need to kill at least two (2) or more of them of them with each split round, so that they are all killed by the final round. You can kill all the splits in the first round, if you like, but I recommend 1 (one), then 2 (tw0) and then 2 (two). The way to do this is to balance the splits down each round so that when one (1) of them dies, you can also kill at least one (1) more before the fifteen-second timer causes them to reform into Waxwork Abolishion. Each split that is killed will not respawn again. |
|
Conqueror of Candlemaker's Workshop: Invaders 010526 |
20 |
Defeat the noted Raid event. |
|
Vanquisher of Candlemaker's Workshop: Invaders xxxxxx |
30 | Complete the three (3) listed Achievements. |
|
Invaders: Unmelted xxxxxx |
10 |
Do not allow any a candlefolk defender or a candlemaster to die. After 55%, every 55-Seconds, two (2) a candlefolk defender will spawn (they can be charmed) . Every other spawn will be a single (1) a candlemaster, that, if allowed, will attack the bosses. The idea here is to aggro them all, but NOT kill them. They all need to survive the entire event. Charming as many a candlefolk defender as possible, but not sending them to attack, would be a helpful. However, it may be a better idea to kite them all, but to do so away from where the a payload specialist and a bomb are being tanked. AoE's will also be a non-no! |
|
Invaders: Enemy of my Enemy 010526 |
10 |
Break the 'Stormshield' with 'Firecrash' each time Glarubaran, the Great Storm puts it up. After about 40%, keep Teknaz, Bringer of Flames near Glarubaran, the Great Storm, as Teknaz, Bringer of Flames will use 'Firecrash' and it will hit Glarubaran, the Great Storm. Make sure they are in close proximity to each other so this happens. |
|
Invaders: No Interaction 070526 |
10 |
Don't allow Lifeleash (a 500-range 450K AoE DD), Stormshield (a reflect) or Firecrash (a 150 AoE Range 13K mana drain) to interact or hit a boss. When any of the three bosses (Glarubaran, the Great Storm, Teknaz, Bringer of Flames or The Loathing Lord) approach 45% drag them 500+ range away from each other, so that their special attacks do not hit or interact each other. |
|
Conqueror of Arcstone, Shattered Isles: Xanzerok 021226 |
20 | Defeat the noted Raid event. |
|
Vanquisher of Arcstone, Shattered Isles: Xanzerok 081626 |
40 | Complete the four (4) listed Achievements. |
|
Xanzerok: Tanglefoot Evasion 081626 |
10 |
Allow no strangle root crawlers to spawn. During the event, about every 55-Seconds, a strangle root crawler will spawn for each Player that does not move to the 'flower' in time. EMOTE: 'Xanzerok calls on the roots deep within the grove and the ground rumbles with their answer.' A large donut shaped yellow ring will appear around the event area. One one side of the yellow ring will be a pie slice missing and is where the 'flower' will be (it's a big red flower and is hard to miss (use /hidemodels all if you have trouble spotting it). Move to the 'flower' ASAP! Everyone must do this (except the main tank?)... every time, so that no a strangle root crawler spawns, at all (they only spawn for Players that fail to get to the flower / pie-slice and out of the yellow aura / decal). This is not as easy as it sounds and is the one most raid forces have issues with. The easiet way to spot the flower is to use /hidemodels all, spin in place to spot the flower and then move to it. This is complicated by the , that will drag targeted players along their path ('A howl echoes throughout the grove as houndlike manifestations begin to coalesce from the shadows of Player and Player.'). The a manifestation of Okahn should be priority kills so that they don't drag Players into the yellow areas... or the Players can gate out. |
| Xanzerok: Banished Manifestation
042326 |
10 |
Kill all a manifestation of Okahn. Kill every a manifestation of Okahn (100%) before it reaches Xanzerok. There will be an emote ('A howl echoes throughout the grove as houndlike manifestations begin to coalesce from the shadows of Player and Player.') When the emote happens, those two (2) Players need to back away to the edge of the event area ASAP. Each a manifestation of Okahn will spawn near / where ever those two (2) Player are. The further a manifestation of Okahn is away from the tree, the longer the raid has to kill a manifestation of Okahn (they do not aggro or fight back). Each a manifestation of Okahn will drag one (1) of the the emoted Players ('Grasping Shadow Pull') along with them... as they slowly move towards Xanzerok. If a manifestation of Okahn is not killed before it reaches Xanzerok, Xanzerok, the Player that is being dragged will be hit with 'Ironbark Hurl' (a 9 Billion DD and a knock back / knock up... essentially a Death Touch). Give the a manifestation of Okahn a level of priority over any other adds that may be up. |
|
Xanzerok: Uprooted 030526
|
10 |
Allow ten (10) or more strangle root crawlers to spawn. During the event, about every 55-Seconds, Xanzerok will call for assistance. EMOTE: 'Xanzerok calls on the roots deep within the grove and the ground rumbles with their answer.' A large donut shaped yellow ring will appear around the event area. On one side of the yellow ring will be a pie slice missing and is also where a flower will appear (it's a big red flower will appear and hard to miss (use /hidemodels all if you have trouble spotting it). Failing this will spawn a strangle root crawler each Player that does not move to the flower in time. Assign a couple of (Players to purposely fail this emote each time, until ten (10) a strangle root crawler have spawned. Kill a strangle root crawler when they appear. Have everyone else move to the flower ASAP! Everyone must do this (except the main tank)... you don't want to wipe from having way too many a strangle root crawler adds!
|
|
Xanzerok: Enraged 031926 |
10 |
Defeat the event using enraged option. This just means the raid will start with Xanzerok all ready enraged and there will be bonus loot drops(s).
|
|
Conqueror of Arcstone, Shattered Isles: Colossus 021626 |
20 | Defeat the noted Raid event. |
|
Vanquisher of Arcstone, Shattered Isles: Colossus xxxxxx |
40 | Complete the four (4) listed Achievements. |
|
Colossus: The Sky is Falling xxxxxx |
10 |
Nobody gets hit by any of the Skyfall debris. After about 50%, a Player will be targeted by 'Skyfall.' A purple-ish aura / decal will appear around the targeted Player. Everyone needs to move out of and / or avoid that area immediately. This must be done every time! EMOTE: 'The colossus tosses a large stone into the air and it hovers heavily over Player.' |
|
Colossus: Crack the Defenses 031926 |
10 |
Don't let Colossus have both armors active at any given time. Drag Colossus into the proper Magical Storm and keep him there until his 'Runic Armor' (spell shielding) or 'Stony Armor' (melee shielding) buff is removed. Do this every time he gets a buff. Only the tank needs to do this... the rest of the raid needs to stay put to avoid damage from the 'Magical Storm.' EMOTE: 'The Colossus glows and runes flow around it.' (Drag Colossus into the red 'Magical Storm'). EMOTE: The storm tears away the runic protection of The Colossus of Skylance. ('Rune Armor' buff removed, go back to raid). EMOTE: The Colossus glows and a layer of armored stone surrounds it. (Drag Colossus into the blue 'Magical Storm'). EMOTE: The storm tears away the stony protection of The Colossus of Skylance. ('Stony Armor' buff removed, go back to raid).
|
|
Colossus: Full Defense xxxxxx |
10 |
Ensure that Colossus one armor active at all times. When Colossus gets one of armor buffs, don't remove it! Only remove one of them when he has both buffs at the same time (see above). |
|
Colossus: Enraged 031926 |
10 |
Defeat the event using the enraged option. This just means the raid will start with Colossus all ready enraged and there will be bonus loot drops(s).
|
|
Conqueror of Ruined Relic: Ashenback 021926 |
20 | Defeat the noted Raid event. |
|
Vanquisher of Ruined Relic: Ashenback xxxxxx |
40 | Complete the four (4) listed Achievements. |
|
Ashenback: Frost Frozen xxxxxx |
10 |
Once frost storm can appear, only remove laval armor from Ashenback using frost storm. During this event Ashenback will buff itself with 'Laval Armor.' This is a 1.9 Billion HP rune. You can DPS it away, but to get this achievement you need to cast cold spells on a susceptible 'Firestorm' (EMOTE: A firestorm becomes unstable.) and turn it into a Frost Storm (EMOTE: A firestorm falters and changes into something new.), then drag Ashenback into the Frost Storm to remove the buff. |
|
Ashenback: Frost Free 021926 |
10 |
Do not use frost storm to remove laval armor from Ashenback. During this event Ashenback will buff itself with 'Laval Armor.' This is a 1.9 Billion HP rune. DPS it away. |
|
Ashenback: Don't Stand in the Fire 040526 |
10 |
No one stands in the puddle of flame. During this event, statioanry puddle of flames will spawn off of the 'Firestorm' magical auras (EMOTE: A small puddle of flames breaks off from the great firestorm.). No one can stand (move into) any of them, at all. |
|
Ashenback: Enraged 033026 |
10 |
Defeat the event using enraged option. This just means the raid will start with Ashenback all ready enraged and there will be bonus loot drops(s).
|
|
Conqueror of Ruined Relic: Shar'Drahn 030126 |
20 | Defeat the noted Raid event. |
|
Vanquisher Ruined Relic: Shar'Drahn xxxxxx |
40 | Complete the four (4) listed Achievements. |
|
Shar'Drahn: Heads Up 030826 |
10 |
No one can get hit by falling rocks. During this event... |
|
Shar'Drahn: Unduplicated xxxxxx |
10 |
No one can be copied by a storm. Avoid the light blue 'Magical Storms' at all costs! This can be a wipe mechanic if not avoided, as it will spawn nasty 'twisted' duplicates of every Player that gets caught inside said 'Magical Storm.' |
|
Shar'Drahn: Only The Young 030126 |
10 |
Allow no Elder Monolith to be summoned. Each time an aura / decal spawns, at least one (1) or two (2) Players needs to get in that aura (10-Seconds... hurry!) to prevent a Elder Monolith from spawning. |
|
Shar'Drahn: Enraged xxxxxx |
10 |
Defeat the event using enraged option. This just means the raid will start with Shar'Drahnall ready enraged and there will be bonus loot drops(s). |
|
Conqueror of The Vortex: The Egg xxxxxx |
20 | Defeat the noted Raid event. |
|
Vanquisher of The Vortex: The Egg 060726 |
40 | Complete the four (4) listed Achievements. |
|
The Egg: Generations 082326 |
10 |
Allow no healthy eggs to be destroyed. During this event a numbner of a good egg will appear. Do not let any of them die. Add them to extended target and heal them when needed! |
|
The Egg: Starvation xxxxxx |
10 |
Allow no foodstuff to reach Tallongast. During this event, three (3) different non-aggro 'foodstuff' (root models) adds will spawn and move towards Tallongast, the Egg. Kill them all (100%) before they reach Tallongast, the Egg. |
|
The Egg: Well Fed xxxxxx |
10 |
Allow Tallongast to eat all of the foodstuff. During this event, three (3) different non-aggro 'foodstuff' (root models) adds will spawn and move towards Tallongast, the Egg. Do NOT kill any of them! Let them reach Tallongast, the Egg. |
|
The Egg: Enraged 092826 |
10 |
Defeat the event using enraged option. Win this event after selecting the 'enraged' version of this raid. This just means the raid will start with Tallongast all ready enraged and there will be bonus loot drops(s). |
|
Conqueror of Labyrinth of Spite: Spitetangle 061826 |
20 | Defeat the noted Raid event. |
|
Vanquisher of Labyrinth of Spite: Spitetangle xxxxxx |
40 | Complete the four (4) listed Achievements. |
|
Spitetangle: Avengement 061826 |
10 |
Defeat Vengecoil and Vengeskin at the same time. During this event Vengecoil and Vengeskin will go active in the last stage of the event. They are stationary, so you have to send split forces to go attack / aggro them ASAP. Balance them down so they both die at the same time. |
|
Spitetangle: Sticky xxxxxx |
10 |
Trap every rusher in webbing, at least once each. During this event a rusher add will spawn and go after an emoted Player. Have a rogue place a 'Spiteful Web' trap, to trap each a rusher at least once. The traps are obtained from a trapper adds, who place them (Rogues can disarm / take them and use them on a rusher). |
|
Spitetangle: Cracked 061826 |
10 |
No one can be entangled in stone for more than 2 Minutes (160-Seconds or 20 Tics). During this event, two (2) Players at a time will get 'banished' into a Stonetangle Prison, somewhere in the surrounding hallways. They ALL need to be broken out ASAP (attack and destroy the non-aggro Stonetangle Prison) within 20-Tics. The Players in the trap can also attack the Stonetangle Prison from the inside. It may help if the Players open their map and /rsay what direction to find them. |
|
Spitetangle: Enraged 091026 |
10 |
Defeat the event using enraged option. Win this event after selecting the 'enraged' version of this raid. This just means the raid will start with Spitetangle all ready enraged and there will be bonus loot drops(s). |
|
Conqueror of Labyrinth of Spite: Echo of Hate 081026 |
20 | Defeat the noted Raid event. |
|
Vanquisher of Labyrinth of Spite: Echo of Hate xxxxxx |
40 | Complete the four (4) listed Achievements. |
|
Echo of Hate: Give in to Greed 081026 |
10 |
Get rid of all the greedlings by giving them what they want. EMOTE: A greedling stops and sniffs the air, holding its hand out. EMOTE: A greedling, satiated with shiny coins, disappears. During this event a greedling adds will spawn. Tank them until they temporarily de-aggro and 'hold their hand out' (emote). Give them 10-Platinum each time, EVERY time. They will emote and despawn / leave after they are 'satiated' by 30-Platinum. |
|
Echo of Hate: What it Wants xxxxxx |
10 |
Trigger the Dark Flagellant first, and allow it to ascend. During this event the Dark Flagellant is trying to kill himself and ascend. Rather than healing him to stop it, let him die and ascend. HOWEVER... do this event LAST! This is becuase the invisible / unseen Ascended Dark Flagellant will start casting 'Ascended Pain' (AoE 550K HP DD) on the raid every 15-Seconds! Non-splash heal, heal, heal! |
|
Echo of Hate: Unfocused xxxxxx |
10 |
Do not allow the Echo to focus it's hatred into any of the magical stones. EMOTE: The Echo burns with hatred of the weak and focuses it into one of the magical stones. (East) EMOTE: The Echo starts to gather all of its self-loathing and focuses it into one of the magical stones. (North) EMOTE: The Echo roils with hatred for all that are not it (South) EMOTE: The Echo glares with rage at all of its opponents and focuses it into one of the magical stones. (West) During this event, in the final phase... an echo have four different emotes that indicate the need to successfully click one (1) of the four (4) floating crystals (one at each doorway, N, S, E & W) within about 10-Seconds. The correct crystals much be clicked, by someone, EVERY time. This might be best accomplished by placing a Player backed into each doorway, and stay there, to click their crystal when needed. |
|
Echo of Hate: Enraged xxxxxx |
10 |
Defeat the event using enraged option. This just means the raid will start with an echo all ready enraged and there will be bonus loot drops(s). |
--------------------------------------------------------------------
Hunter Achievements do not require you to be in zone. Just be in the group / raid and you will get credit for the Hunter kill, no matter where you are.
|
NAME |
POINTS | NOTES | REWARD(S) |
|
Novice Shattering of Ro Hunter 121925 |
30 | Complete the two (2) listed Achievements. | Stormslayer's Satchel (44-Slot 100% Bag) |
|
Hunter of Scarred Grove 121725 |
35 | Defeat the thirteen (13) listed targets. | N / A |
|
Hunter of Candlemaker's Workshop 121925 |
25 | Defeat the ten (10) listed targets. | N / A |
|
Adept Shattering of Ro Hunter 011626 |
40 | Complete the two (2) listed Achievements. |
Stormslayer's Rucksack (46-Slot 100% Bag). |
|
Hunter of Arcstone, Shattered Isles 011626 |
20 | Defeat the eight (8) listed targets. | N / A |
|
Hunter of Ruined Relic 122925 |
20 | Defeat the eight (8) listed targets. | N / A |
|
Veteran of Shattering of Ro Hunter 020626 |
50 | Complete the two (2) listed Achievements. | Stormslayer's Backpack (48-Slot 100% Bag). |
|
Hunter of The Vortex 020626 |
25 | Defeat the nine (9) listed targets. | N / A |
|
Hunter of Labyrinth of Spite 011426 |
25 | Defeat the ten (10) listed targets. | N / A |
BACK TO TOP OF CATEGORY BACK TO TOP OF PAGE
--------------------------------------------------------------------
|
NAME |
POINTS | NOTES |
|
The Scars We Bear 122925 |
25 | Complete the two (2) listed Achievements. |
|
Scarred Grove Scavenger 122825 |
20 | Complete the four (4) listed Achievements. |
|
Seeds of Growth 122825 |
10 |
Acquire and 'collect' (click) the eight (8) listed items. These are known to drop in Scarred Grove from wolves & treants (and maybe the plants). |
|
Legacies of Nature 121225 |
10 |
Acquire and 'collect' (click) the eight (8) listed items. These ground spawns are primarily found in the northern areas of Scarred Grove. |
|
Remnants of War xxxxxx |
10 |
Acquire and 'collect' (click) the eight (8) listed items. These are known to drop in Scarred Grove from undead and the MoB's from each camp. |
|
Earthborn Oddities 120225 |
10 |
Acquire and 'collect' (click) the eight (8) listed items. These are known to drop in Scarred Grove from golems. |
|
Candlemaker's Workshop Scavenger 122925 |
20 | Complete the four (4) listed Achievements. |
|
What Burns 122925 |
10 |
Acquire and 'collect' (click) the eight (8) listed items. These can drop from 'zone trash' in the Waxwork Abolishion mission in Candlemaker's Workshop. |
|
Stay Waxy 121425 |
10 |
Acquire and 'collect' (click) the eight (8) listed items. These are ground spawns in Candlemaker's Workshop. |
|
Tinker's Lost Trinkets 121925 |
10 |
Acquire and 'collect' (click) the eight (8) listed items. These are ground spawns in Candlemaker's Workshop. |
|
Lost and Found 120925 |
10 |
Acquire and 'collect' (click) the eight (8) listed items. These are known to drop in Candlemaker's Workshop from most trash MoB's in the zone. |
|
Echo's of Arcstone xxxxxx |
30 | Complete the two (2) listed Achievements. |
|
Arcstone, Shattered Isles Scavenger xxxxxx |
20 | Complete the four (4) listed Achievements. |
|
Roots of Decay xxxxxx |
10 |
Acquire and 'collect' (click) the eight (8) listed items. These are drop from 'root' MoB's in Arcstone, Shattered Isles. |
|
Relics of the Fallen Order xxxxxx |
10 |
Acquire and 'collect' (click) the eight (8) listed items. These are drop from undead in Arcstone, Shattered Isles. |
|
Relics of the Shattered Sky 121425 |
10 |
Acquire and 'collect' (click) the eight (8) listed items. These are ground spawns in Ruined Relic. |
|
Stones of the Sky 121725 |
10 |
Acquire and 'collect' (click) the eight (8) listed items. These are ....... in Arcstone, Shattered Isles. |
|
Ruined Relic Scavenger xxxxxx |
20 | Complete the four (4) listed Achievements. |
|
Shards of the Spellstorm 011526 |
10 |
Acquire and 'collect' (click) the eight (8) listed items. These are ....... in Ruined Relic. |
|
Ashes of the Shattered 122825 |
10 |
Acquire and 'collect' (click) the eight (8) listed items. These are ....... in Ruined Relic. |
|
Relics of the Forbidden 122925 |
10 |
Acquire and 'collect' (click) the eight (8) listed items. These are known to drop in Ruined Relic from Scrykin MoB's. |
|
Echoes of the Broken Mind xxxxxx |
10 |
Acquire and 'collect' (click) the eight (8) listed items. These can drop from 'zone trash' (primarily scrykin) in the Shar'Drahn mission in Ruined Relic. |
|
Vestiges of the Vortex xxxxxx |
35 | Complete the two (2) listed Achievements. |
|
The Vortex Scavenger xxxxxx |
20 | Complete the four (4) listed Achievements. |
|
Wellspring of the Shattering 122925 |
10 |
Acquire and 'collect' (click) the eight (8) listed items. These are primarily found as ground spawns in the nest / bird & biomechanical / octopus areas of The Vortex. |
|
Cores of Converged Chaos 123125 |
10 |
Acquire and 'collect' (click) the eight (8) listed items. These are primarily found as ground spawns in the 'cloth' and 'scrykin' areas of The Vortex. |
|
Fusion of the Impossible 123125 |
10 |
Acquire and 'collect' (click) the eight (8) listed items. These are known to drop in The Vortex from scrykin MoB's. |
| Relics of the Storm | 10 |
Acquire and 'collect' (click) the eight (8) listed items. These are known to drop in The Vortex from cloth butterfly MoB's. |
|
Labyrinth of Spite Scavenger 121425 |
20 | Complete the four (4) listed Achievements. |
|
Fragments of Spite 121425 |
10 |
Acquire and 'collect' (click) the eight (8) listed items. These are ground spawns in the sewer section of Labyrinth of the Spite. |
|
Venomous Last Words 121325 |
10 |
Acquire and 'collect' (click) the eight (8) listed items. These drop in Labyrinth of the Spite, primarily from spiders, drachnids and golems. |
|
Darkened Bones 121325 |
10 |
Acquire and 'collect' (click) the eight (8) listed items. These drop in Labyrinth of the Spite, primarily from Dark Elves & Dark Gnomes. |
|
Detritus of Detestation 121325 |
10 |
Acquire and 'collect' (click) the eight (8) items. These are ground spawns in the upper area of Labyrinth of the Spite. |
BACK TO TOP OF CATEGORY BACK TO TOP OF PAGE
--------------------------------------------------------------------
The generic strats / info below are from Dev Beta notes, successful raids that I was part of, from what I recall and / or from research. The below info does not include details on how to complete raid-related achievements. Those are noted elsewhere on this page, if there are any. The below info should be adapted, as seen fit, by your Raid Leader. Raid make-up (classes, levels, Player skill levels, etc.) can and do make a difference on raid strategy options and winning or losing. Key emotes may also be noted below. Players fulfilling their roles, using assist, and following emotes is always essential. There is all most always more than one variant strategy that can successfully defeat a raid. As Levels increase, defeating old raids can prove much easier and more forgiving (potentially even as a group or solo / molo, depending on how old the raid event is). However, sometimes, certain mechanics still have to be honored. It has been known that in some events, due to such raid mechanics (i.e. too much DPS; killing MoB X before MOB Y; and similar) can bug the raid and cause it to fail. Some of these targets may require 'zerging' into the zone get to them (kill stuff along the way). They may also have 'adds' which are normally more like 'trash' MoB's. The original / older targets / encounters were pre-raid window events. Those 'raids' were more of a collective effort, or better, an extremely challenging group event. Any effects noted below can sometimes 'scale to level,' so the effects can be lesser or greater than stated, depending on raid force character levels. On Progression servers, targets can use 'Mitigation of the Mighty' (mitigates Spell, Melee & DoT Damage), at least until such time as certain later expansions unlock, which is typically at least seven-plus expansions after the expansion of the related target. While older targets are static open-world (non-instance) events, there are now an Agent of Change in various locations that will offer an instanced version of those same events (noted below, if any).
Tier 1 raids unlocked in January 2026. Tier 2 raids unlocked in February 2026. Tier 3 raids unlocked in March 2026.
THE INVADERS (Tier 1) WORKSHOP ABOLISHION (Tier 1)
COLOSSUS OF SKYFIRE (Tier 2) XANZEROK (Tier 2) ASHENBACK (Tier 2) SHAR'DRAHN (Tier 2)
TALLONGAST, THE EGG (Tier 3) SPITETANGLE (Tier 3) ECHO OF HATE (Tier 3)
If I missed anything or got something wrong, let me know!
|
CANDLEMAKER'S WORKSHOP - THE INVADERS (Tier 1) From Defender Tiggle in Candlemaker's Workshop, key word 'Large.' |
|||
|
The gods of the three armies and, frankly, their most competent leadership, have moved on. None of the armies have really trusted or liked each other, and now that their leaders have left, they are struggling to work together. But, of course, they still can work together to defeat their mutual enemies. When the event starts the three bosses, Teknaz, Bringer of Flames, Glarubaran, the Great Storm, and a Loathing Lord are standing about glaring at each other.
STAGE ONE: Have pore-assigned tanks aggro their assigned boss and stack them together.
STAGE TWO: All bosses individually start summoning adds every 12% (80%, 68%, 56%, 44%, 32%, 20%, 8%). Careful DPS control can trigger the add spawns separately, rather than at the same time.
STAGE THREE: 'Candlefolk' adds begin and attack, as they see the raid as 'intruders.'
STAGE FOUR: The bosses each start casting spells that might not be helpful to each other. They held back until now, but imminent death has made them care a lot less about their alliance (these are cast every 5%).
Defeat all three (3) bosses and win the event. |
EMOTE: With a scream, a furious goblin rushes into the area holding several explosive devices. (a payload specialist has spawned.) EMOTE: A flame elemental charges into the area. (a flame elemental has spawned.) EMOTE: Moaning, shambling forms appear.(Three (3) an inferior spite have spawned.) EMOTE: Candlefolk appear to join the battle. (Candlefolk adds have spawned.) EMOTE: The Loathing Lord begins casting Mummy's Touch. EMOTE: The Loathing Lord begins casting Aggressive Mummy's Touch. (Out of balance enhanced spell cast). EMOTE: The Loathing Lord begins casting Lifeleash. EMOTE: Glarubaran, the Great Storm begins casting Lightning Flash. EMOTE: Glarubaran, the Great Storm begins casting Impressive Lightning Flash. (Out of balance enhanced spell cast). EMOTE: Glarubaran, the Great Storm begins casting Stormshield. EMOTE: Teknaz, Bringer of Flames begins casting Firesplash. EMOTE: Teknaz, Bringer of Flames begins casting Inspired Firesplash. (Out of balance enhanced spell cast). EMOTE: Teknaz, Bringer of Flames begins casting Firecrash. |
||
|
CANDLEMAKER'S WORKSHOP - WORKSHOP ABOLISHION (Tier 1) From Defender Tovani in Candlemaker's Workshop, key word 'Large.' |
|||
|
Another of Brell's long abandoned creations, this war beast has been reawakened after the invading forces attacked, resulting in the destruction of part of the candlefolk's forest. The Waxwork Abolishion will rotate between two stages... the Waxwork Abolishion with adds and auras (decals); and split into five (5), or less, smaller sized versions of Waxwork Abolishion (variable percentage based). BASE STARTEGY:
Waxwork Abolishion uses:
Start the event by the tank talking to Waxwork Abolishion (keyword: 'Destroy.').
|
EMOTE: The Waxwork Abolishion is fired up as its flames burn bright. (Waxwork Abolishion is doing extra damage.) EMOTE: The Waxwork Abolishion begins to cool down. (Waxwork Abolishion is no longer doing extra damage.) EMOTE: The Waxwork Abolishion splits its fire and shifts its wax, preparing to separate. (Waxwork Abolishion is about to split into adds.) EMOTE: The Waxwork forms groan and begin preparations to reform. (Waxwork Abolishion is reforming.) EMOTE: The wax surrounding the area begins to form into additional reinforcements. (Three waxwork adds incoming.) EMOTE: The Waxwork Abolishion ignites and launches a barrage of hot wax globs high into the air. (Six Players are needed, immediately, in each red aura / decal to prevent additional adds and more damage.) |
||
|
ARCSTONE, SHATTERED ISLE - XANZEROK (Tier 2) From Black Jay in Arcstone, Shattered Isle, key word 'Large.' |
|||
|
Xanzerok is an ancient treant that has grown irrationally aggressive due to the destruction of Arcstone. Now viewing anyone and anything a threat to what is left of his grove, he now lashes out at even would-be allies. BASE STRATEGY:
STAGE ONE:
STAGE TWO:
STAGE THREE:
|
EMOTE: Fragments of Arcstone plummet to the ground. (You have 20-seconds to avoid the falling rock locations... defined by three (3) red circle / decals on the ground in the immediate area.) EMOTE: The leaves around the grove rustle as creatures come to the aid of Xanzerok. (Three adds have spawned. Kill them ASAP.) EMOTE: Fragments of Arcstone plummet to the ground. (Rocks are falling, you have ~20-seconds to move out of the red ground auras / decals.) EMOTE: A howl echoes throughout the grove as houndlike manifestations begin to coalesce from the shadows of Player1 and Player2. (The two named Players need to to the edge of the event area to the southwest-ish so that the adds spawn away from the boss.) EMOTE: Xanzerok calls on the roots deep within the grove and the ground rumbles with their answer. (Move to the clear / safe area at the flower, ASAP.) EMOTE: The air around the grove becomes charged with energy and begins to swirl around. A storm is forming. (A Magical Storm has spawned. Avoid it.) EMOTE: Roots burst from the ground around the feet of Player 1, Player2, et cetera. (Adds have spawned due the named Players failing to move to the red flower.) |
||
|
ARCSTONE, SHATTERED ISLE - COLOSSUS OF SKYLANCE (Tier 2) From Black Jay in Arcstone, Shattered Isle, key word 'Large.' |
|||
|
Two storms move idly around on different edges of the play space. Several golems move about tossing rocks and magical ruins into one of the storms. BASIC STRATEGY:
STAGE ONE:
STAGE TWO:
STAGE THREE:
STAGE FOUR:
|
EMOTE: The colossus tosses a large stone into the air and it hovers heavily over Player. (Named Player needs to run away at least 125-range from main raid until the 'Boulder Slam' effect is gone / lands.) EMOTE: Skittering and odd crooning sounds can be heard even before the creatures making them teleport into the area. (Scrykin adds spawned.) EMOTE: A massive stone foot slams the ground creating a shockwave. (Stand up!) EMOTE: The Colossus glows and a layer of armored stone surrounds it. (Main tank, only, needs to drag The Colossus of Skylance into the 'red' magical storm until the buff is removed.) EMOTE: The storm tears away the stony protection of The Colossus of Skylance. (Buff removed, main tank take The Colossus of Skylance back to the main raid.) EMOTE: The Colossus glows and runes flow around it. (Main tank, only, needs to drag The Colossus of Skylance into the 'blue' magical storm until the buff is removed.) EMOTE: The storm tears away the runic protection of The Colossus of Skylance. (Buff removed, main tank take The Colossus of Skylance back to the main raid.) EMOTE: You feel your body crackle with power as it burns. (Get out of the magical storm!) EMOTE: You feel your skin turning to stone and fracturing before falling off. (Get out of the magical storm!) EMOTE: You fall under the shadow of a falling stone. (You have 10-Seconds to move out of the purplish-aura!
|
||
|
RUINED RELIC - ASHENBACK (Tier 2) From Gwork in Ruined Relic, key word 'large enough.' |
|||
|
Ashenback, like many in the area, has been "damaged" by the destruction of the Plane of Magic. It seems that the only thing to be done about it is to subdue him until the goddess herself can return and fix him. BASE STRATEGY:
STAGE ONE:
STAGE TWO: At 75% Ashenback starts to use, about every 140-Seconds, 'Laval Armor' (self buff Rune to 100% Damage for 1.9 Billion HP; and +3,500 Damage Shield). It fades once it has absorbed enough damage.
STAGE THREE:
|
EMOTE: A small puddle of flames breaks off from the great firestorm. (A stationary puddle of flames has appeared. Ignore it, but heal through it's spell attacks.) EMOTE: A firestorm appears, summoned by Ashenback's rage. (A 'Firestorm' magical storm has appeared. It roams the outer edge of the platform. Keep Ashenback away from it and generally ignore it..) EMOTE: Ashenback encases his body with lava. (Ashenback has runed himself. Either DPS through it, or drag Ashenback into a 'Frost Storm' to remove it.) EMOTE: Ashenback's growing rage spawns another firestorm. (Ashenback has spawned a second 'Firestorm,' that can roam closer to the raid.) EMOTE: A firestorm becomes unstable.(the second Forestorm is now subsceptible to cold based spells.) EMOTE: A firestorm falters and changes into something new. (A Firestorm has temporarily changed into a Frost Storm.) EMOTE: A frost storm smothers a puddle of flames. (The Frost Storm eliminated a puddle of flames.) EMOTE: A frost storm smothers Ashenback's laval armor. (A Frost Storm has removed the 'Laval Armor' buff from Ashenback.) EMOTE: The frost storm restabilizes back into a firestorm. (A Frost Storm has converted back into a Firestorm.) |
||
|
RUINED RELIC - SHAR'DRAHN (Tier 2) From Gwork in Ruined Relic, key word 'large enough.' |
|||
|
Shar'Drahn has lost his mind with the shattering of the plane. He has some unconscious control over the wild storms and as his anger and pain grows, they appear more often. BASE STRATEGY:
STAGE ONE: Shar'Drahn will attack.
STAGE TWO: At 90% Shar’Drahn starts using 'Lighting Breath of Shar`Drahn' about every 40-Seconds (Frontal AoE 650 HP DD with 10K Mana Drain.
STAGE THREE:
STAGE FOUR: At 60% 'Sheltering Stone' and 'Ethereal Rockfall' will begin and continue until the end of the event.
STAGE FIVE: 40% Shar’Drahn starts using 'Wing Surge' (AoE 600-Range 350K HP DD with a Knockback (15) and Push Up (10).
Defeat Shar’Drahn for the win (if an Elder Monolith is up, you can not kill Shar'Drahn until it is dead). |
EMOTE: Magic fluctuates again, and a storm remakes itself. (A Magical Storm has changed form.) EMOTE: Shar`Drahn's rage summons another storm. (A second Magical Storm has appeared..) EMOTE: You hear stones crash into each other in the air above the platform, the shockwave temporarily disperses the storms. ('Sheltering Stone' & "Ethereal Rockfall' are about to happen.) EMOTE: You are now your true self. (You got caught in a 'Twisted Duplicate' storm and have spawned an add.) EMOTE: Swirling magic strangles your voice and mind. (Get out of the Magical Storm!) EMOTE: A convection of magic shatters your mind. (Get out of the Magical Storm!) EMOTE: Swirling gravity pulls you in. (Get out of the Magical Storm!) EMOTE: The swirling magic of the storm burns you. (Get out of the Magical Storm!) EMOTE: The wild storm rearranges your body slightly. (You are in beneficial storm. No worries!) EMOTE: Stones fall from the ruins above you and slam into the platform. (You may want to move by the rock wall that has appreared, to protect from 'Wind Surge' attacks. |
||
|
THE VORTEX - TALLONGAST, THE EGG (Tier 3) From Archsage Feish in The Vortex, key word 'Large.' |
|||
|
Tallongast has been transformed, back into his egg form by the explosion. The Nanny has placed it here while they go out to get any other eggs they can find and bring to this temporary nursery. Many of those eggs are tainted and dangerous, and Tallongast is pretty unhappy about its new circumstance. BASE STRATEGY:
STAGE ONE: Tallongast the Egg attacks and four (4) moth adds at a time will spawn and continue to do so for the entire event.
STAGE TWO: At 88% Tallongast, the Egg will start using 'Swallow' on the Player highest on aggro (10-Second Stun). This will continue for the rest of the event. The Nanny also begins to appear as Tallongast, the Egg loses health and drops off eggs (all are purplish in color) of various types, around the perimeter (as well as placing Player corpses in eggs to change the eggs).
Once enough eggs have been destroyed... and an path is cleared... take Tallongast, the Egg towards the outer edge of the event area (but not too close to the edge (so as not to tether Tallongast, the Egg).
STAGE THREE: At 57% three types non-aggro of 'Foodstuff' (root models) will start to spawn for every 10% Health of Tallongast the Egg, for the rest of the event.
|
EMOTE: The Tallongast Egg swallows its most hated foe, decides they are not tasty, and spits them to the ground. (Tallongast, the Egg 'swallowed' the main tank.) EMOTE: Tallongast injects incipient poison into Player, Player, and Player. Tallongast infests anti-antivenin into Player, Player, and Player. (Tallongast has poisoned six Players.) EMOTE: You feel poison growing in your body. (Get cured withing 6-Tics.) EMOTE: Poison explodes out of all of your pores. (You failed to get cured and now have a worse effect! Cure this one!) EMOTE: You feel powerful negative energy enter you. (Do NOT cure this effect.) EMOTE: Malicious venom flies from an ally and invades your body. (You got cured and should not have been. You now have a nastier non-curable 2-Tic DoT.) EMOTE: The Nanny appears with a huge number of eggs and places them around the edge of the platform. (The Nanny has placed eggs around the perimeter. Range / Pet kill them, ASAP.) EMOTE: The Nanny appears with several eggs and places them near the center of the platform.(The Nanny has placed eggs about the center area. Range / Pet kill them, ASAP.) EMOTE: The Nanny rescues one of your dead, placing it into a new, tainted egg. (The Nanny has crerated an egg from a Player corpse. Range / Pet kill it, ASAP..) EMOTE: Player is hit with a silk stringer. (The named Player has been rooted for 3-Tics.) EMOTE: The blood will not stop due to something in the moth's saliva. (You have been hit with non-curable a 6-Tic 651K HP DD... heals!) EMOTE: A gaseous explosion slams into you. (a bloated foodstuff got to Tallongast, the Egg and exploded.) EMOTE: Moths are atracted to your fireworks. (Moth adds incoming.) (Yes, 'atracted' it is currently spelled wrong in game... maybe use 'to your fireworks.' in case a correction is made?) EMOTE: Tallongast, the Egg, calls for snacks! ('Foodstuff' MoB's spawned and are incoming.) |
||
|
THE LABYRINTH OF SPITE - SPITETANGLE (Tier 3) From Kerina, Lost Soul in Labyrinth of Spite, key word 'Face it.' |
|||
|
Spitetangle is a manifestation of Spite. It twists and tangles all of your petty hatreds and dislikes. BASE STRATEGY:
STAGE ONE: Start the event by speaking to Archsage Feish (keyword: 'End').
Adds will include:
After each add type has appeared and / or Spitetangle is at ~76%, Stage Two will begin. STAGE TWO: Everything continues as noted, but two (2) more things get added to the mix:
Move to the next stage once Spitetangle hits 45%. STAGE THREE: Spitetangle will de-aggro and Vengeskein and Vengecoil will appear. Both are tethered (DON'T tether them).
Defeat Spitetangle for the win. |
EMOTE: The Spitetangle weaves poison around [Player] (A Green Aura has formed around the noted Players location. Move out of and / or avpoid the green aura.) EMOTE: Poison starts to swirl around you. (You need a posion cure.) EMOTE: You are doused with poison. (You need a poison cure.) EMOTE: You have taken [xxx] damage from Poisonous Explosion by a poisonous explosion. (You need a poison cure.) EMOTE: The Spitetangle shakes furiously. Creatures fly from its back and land nearby. (Adds spawned.) EMOTE: Tangles of spitethread weave themselves together, preparing to become living things.(twisted egg sacs have spawned somewhere in the hallways... go destroy them before they hatch.) EMOTE: The Spitetangle chooses victims and places them into a stone tangle somewhere in the sewer, sending away [Player] and [Player]. -(The two named Players have been banished into a Stonetangle Prison. Go destroy them to set the Players free.) EMOTE: A spider drops a web trap. (Avoid the trap. Rogues can disarm it and use them later on a risher add.) EMOTE: Strands of web go everywhere. You have the presence of mind to gather them up. These might be useful later. (A rogue has disarmed the web trap and now has it to use later on a rusher add.) EMOTE: An enemy breaks free from a makeshift web trap. (a rusher has been trapped by a rogue and reset to spawn point.) EMOTE: A creature of Spite jumps on your back. (You have taken significant damage.) |
||
|
THE LABYRINTH OF SPITE - ECHO OF HATE (Tier 3) From Kerina, Lost Soul in Labyrinth of Spite, key word 'Face it.' |
|||
|
Spitetangle must be defeated (see above) before this event can be undertaken (same raid, same zone). This raid is similar to the Group Mission, on steroids. This raid is very involved, so there is a lot to understand and pre-prepare for. BASE STRATEGY / PREPARATION:
EVENT AREA INFO: NORTH:
EVENT AREA INFO: SOUTH:
EVENT AREA INFO: EAST:
EVENT AREA INFO: WEST:
MAIN EVENT 100%:
MAIN EVENT 79%:
MAIN EVENT 59%:
MAIN EVENT 39%:
MAIN EVENT 19%:
FINAL STAGE - BACK TO 100%:
|
EMOTE: Creatures form out of pure hatred. (Four Gnome Adds.) EMOTE: The echo destroys the mystical candles and takes their magic to form its own creation. (An ooze spawned... avoid it.) EMOTE: Aggressive boiling wax churns and focuses on Player (Named Player needs to kite ooze away from raid, until it goes after another Player). EMOTE: A greedling stops and sniffs the air, holding its hand out. (Give 10 Platinum to a greedling.) EMOTE: A greedling, satiated with shiny coins, disappears. (a greedling has despawned.) EMOTE: The echo spews spite, forming it into physical creatures. (Three a spite forgatherer have spawned, assist and kill them ASAP.) EMOTE: ...has been slain by... (A Player has died and a death add has spawned... kill it ASAP). (ONLY applies in final phase.) EMOTE: The Echo burns with hatred of the weak and focuses it into one of the magical stones. (Click the East Crystal ASAP.) EMOTE: The Echo forgets its hatred of your weakness, for the moment. (East Crystal click success.) EMOTE: You are overcome with a sense of weakness in the face of power. (East Crystal click fail... an echo can hit harder.) EMOTE: The Echo starts to gather all of its self-loathing and focuses it into one of the magical stones. (Click the North Crystal ASAP.) EMOTE: The Echo's self-loathing recedes. (North Crystal click success.) EMOTE: The Echo expresses its self-hatred. (North Click fail.. an echo gained a 1.7 Billion HP rune.) EMOTE: The Echo roils with hatred for all that are not it. (Click the South Crystal ASAP.) EMOTE: The Echo's hatred of others is derailed momentarily. (South Crystal click success.) EMOTE: The Echo explodes with hatred of all that are not it. (South Crystal click fail... AoE 'Burn the Others' DoT incoming... a 5-Tic 451K HP / 10K Mana Drain DoT with 35% Snare). EMOTE: The Echo glares with rage at all of its opponents and focuses it into one of the magical stones. (Click the West Crystal ASAP.) EMOTE: The Echo's rage fades. (West Crystal click success.) EMOTE: The Echo's rage peaks. (West Crysal click fail... an acho can now Flurry.) EMOTE: The echo sends power away, off into the labyrinth. (an echo HP locked and Event rooms active, go defeat the next event.) EMOTE: The Dark Oppressor has appeared (East Dark Oppressor event active.) EMOTE: The Dark Oppressor realizes that it is the weakest creature in its small domain, and surrenders. (East Dark Oppressor defeated... an echo can now target low Hit Point Players... see event info to the left.) EMOTE: Not enough of the most common species confront the Dark Stranger, and so it cannot be harmed. (More designated properly illusioned Players need to be inside the South event.) EMOTE: The Dark Stranger is vulnerable, being surrounded by a proper sized group of the most common species. (South Dark Stranger active.) EMOTE: The Dark Stranger falls, but it is not forgotten. (South Dark Stranger defeated... an echo can now banish.) EMOTE: The Dark Maniac has appeared, devoted to showing you the depths of your hatred. (West Dark Maniac event active.) EMOTE: The Dark Maniac falls, but it is not forgotten. (West Dark Maniac defeated, an echo can now charm.) EMOTE: The Dark Flagellant has appeared and will defeat you by defeating himself. (North Dark Flagellant event active.) EMOTE: The Dark Flagellant, filled with health, fades away. (North Dark Flagellant event defeated.) EMOTE: The Echo recognizes the weakest among you: Player, Player, Player, and Player. (Four named Players, and the pre-designated 'savior' Players, need to to immediatley run to the pre-designated corners.) EMOTE: Your presence protects the weak, and you suffer for it. (Success as a savior / protector... see event details to left.) EMOTE: >>NEED EMOTE<< (North Dark Flagellant ascended... Echo has a new DoT and 'Ascended Pain' will now hit raid every 15-Seconds... see details to left.) EMOTE: The Echo sends some of those that are not like the others away into the labyrinth. (Improperly illusioned Players have been banished, bne ready for trash adds.) EMOTE: Boiling wax burns you painfully. (Get away from oozes!) EMOTE: The Dark Maniac invests its mania into Player. (Named Player has been temporarily charmed.) EMOTE: You lose control of yourself! (You have been temporarily charmed.) EMOTE: You have control of yourself again. (You are no longer charmed.) EMOTE: A spite forgatherer pulls spite from those around it and grows stronger and swifter. (a spite forgatherer has increased in Attack.) EMOTE: The pain you feel from your own failures is exquisite. (AoE 550 HP DD 'Ascended Pain' went out -- HEALS HEALS HEALS!). EMOTE: The Echo sends some of those that are not like the others away into the labyrinth. (Improperly illusioned Players have been banished, be ready for adds.) EMOTE: You become overwhelmingly tainted by spite. (You are dotted... range-fight a spiteling unless otherwsie designated.) EMOTE: An echo shakes its head, then grins. Good. The longer you live, the more suffering I can offer you and the angrier I will be. (Enrage timer started.)
|
||
BACK TO TOP OF CATEGORY BACK TO TOP OF PAGE
--------------------------------------------------------------------
Lore is from / based on Daybreak expansion release information, Producer's Letters, per Dev postings and / or Beta Forum Info.
|
SHATTERING OF RO Druzzil Ro was murdered, Solusek Ro is out for vengeance, and you are his target! He seeks to end the pact protecting mortals and is gaining allies quickly! Druzzil Ro is dead, and Solusek Ro demands vengeance! A cataclysmic explosion has shattered the Plane of Magic, and the only witness is Firiona Vie. Is she responsible? No one can be sure while she lies unconscious in the Plane of Growth. But the Burning Prince is done with waiting, for he has suffered his last indignity at the hands of careless mortals. His rage burns hotter than it has in centuries, and the planes themselves will feel his wrath! Now, with magic itself sundered and storms of unstable magical energy sweeping across both Norrath and the planes, Solusek seeks to end the pact that has protected mortals since their birth, and he’s already gained unexpected support. Rallos Zek, the God of War, and Innoruuk, the God of Hate, see much to gain for themselves in Solusek’s actions. Together, these three unlikely and exceedingly distrustful allies have brought their crusade to the Plane of Growth. But Tunare, Goddess of Growth, does not stand alone. Lord Mithaniel Marr, the Truthbringer, has taken to the field in defense of his longtime ally, and even Quellious, the Goddess of Tranquility, has arrived. However, Quellious remains neutral, aiding the injured on both sides while simultaneously seeking an alternative to this burgeoning planar war. |
|
|
Scarred Grove Like much of the Plane of Growth, the Scarred Grove was once an idyllic tapestry of rolling hills, babbling brooks, lush forests, and transcendent waterfalls that all manner of fauna and flora called home. That picturesque beauty and tranquil serenity has been shattered by the Burning Host’s brutal assault, spearheaded by Solusek Ro, Rallos Zek, and Innoruuk. Fortress walls erected, war camps constructed, and siege engines primed; the battlelines have been drawn as the Verdant Defenders, led by Tunare and Mithaniel Marr, seek to stop the Burning Host from pushing deeper into the Plane of Growth. As the Tree of Life burns, both forces call out for champions to take up arms in their name to bring a swift conclusion to this conflict. Which side will you choose? |
Candlemaker's Workshop This is the Candlemaker's Workshop. Here is where Brell comes to experiment with various waxes, scents, wicks, and other materials. He also makes creative and unusual candlestick and, well, candlefolk. To facilitate his work, most of the necessary resources naturally occur in the area, including a small welling of Clay of Cosgrove. Unfortunately, Solusek and Rallos came through here with their armies and tried to "convince" the lord of the Underfoot to agree to alter the pact. They have damaged a lot of the area, killed many candlefolk, and ruined a lot of the natural resources. Solusek and Rallos have since left by following a river up into the Plane of Growth, but many of their minions remain. Their goal is to hinder Brell and hopefully get him to give in and change the pact. The reality is that Brell has been paying little attention to their antics. Brell knows his minions well. He knows that the candlefolk aren't fully realized creatures, their lives are very short, and their deaths don't mean much to them. They are constantly reformed anyway. His gnolls and other warriors will fight in his defense, and the dwarves and gnomes will defend his workshop as long as he is there. And, in the end Brell can just go to another workshop and work on something else. But right now, he wants to work on candle-related projects, so he stays here. ....................................... In the vast lower mantle of Norrath lies a Candlemaker's Workshop belonging to Brell Serilis, Lord of the Underfoot. One of many secret sanctuaries dedicated to Brell's endless research, this once peaceful corner of the Underfoot has been disrupted by the Burning Host, which burned a path straight through it to reach the Plane of Growth. But the Underfoot is vast and mostly takes care of itself. So while the gods wage their war, Brell continues to tinker. But Brell always seems to know more about the happenings in and around Norrath than most realize, and he also worries for his candle folk, the original denizens he created in this part of the Underfoot, who are now at great risk due to the hostility of the remaining invaders. If any mortals happen to find their way to him, might Brell aid them in resolving these recent, cataclysmic events? Perhaps for a price. |
|
Arcstone, Shattered Isles This is Arcstone, Isle of Spirits in ruin. A massive explosion has destroyed the tower Skylance and the Relic. This magical explosion first sent shockwaves through the isle, breaking it into pieces, scorched the land, and then rained down pieces of the tower. The explosion occurred in or near the tower, blasting out in a northwestern direction. The isle has been broken up into nine pieces, three of which the players cannot reach. The land is inhospitable and the inhabitants have all gone mad. ....................................... Shattered by the explosion that killed Druzzil Ro, Arcstone, Shattered Isles has a familiar landscape scattered across multiple broken and scarred islands. Some are covered in lava while others have lush growth. Magic is broken, and the impossible is everywhere. Traversal of the islands requires swimming through lava, waterfalls, and the wild growth of vines. Death swept across this plane when the magical cataclysm that ripped it apart occurred. Many of those who survived have been driven insane, often as a direct result of the connection they shared with their shattered goddess. Can they be saved, or do they need to be mercifully ended? |
Ruined Relic Relic has been shattered. An explosion from one of the portals into Skylance has torn the Relic apart. It now floats in pieces, some too small to even see. Navigation is treacherous. Druzzil Ro's touch is missing -- a ship without its navigator. Tsikut, the only remaining sane creature left in Relic following the blast, is seeking an orderly investigation and restoration. However, scrykin and other planar creatures have been affected most dreadfully by the blast. They now find it difficult to persevere without sabotage from untrusting agents, or simply those seeking power for themselves, and new threats arise almost every day. The area itself is slowly being rebuilt, with its remaining residents seeking access to the broken pieces of the artifacts that remain, utilizing whatever chaotic magic they can wrangle. |
|
The Vortex The Vortex was created when [REDACTED] exploded in a room full of powerful Tears of Veeshan. The [REDACTED] had enough power to trigger the Tears of Veeshan, releasing an explosion that tore the entire Plane of Magic to shreds. Chunks of Skylance and Relic fell to slam into Arcstone below. But the most unusual effect of the explosion was to rip open the doors. These doors are portals to extra-dimensional spaces that Druzzil Ro and her key minions used to store, keep, or imprison all sorts of strange things. Some of these extra-dimensional spaces themselves are strange places (perhaps the inside of a meteor someplace in space, or a plane that is completely full of marshmallows) that could contain or even be made of just about anything. When these spaces were violently exploded out into the Plane of Magic, and much of what players will see in the Vortex comes from those places. ....................................... The Vortex is chaos. Arcstone, Shattered Isles, and Ruined Relic are all afflicted by magic storms. But Vortex is a magic storm made manifest. Cloth is solid. Mechanical tentacles grow in the sky. Feathers swirl about, ending in a titanic nest. Water is as hard as steel. Creatures were born of this chaos. Each resembles the area they live in. Butterflies made of cloth, rainbow colored vultures, octopi made of metal, and lizards that swim like fish. Can Norrathians find out more about the cause of Druzzil Ro's death in this chaos? |
Labyrinth of Spite From the descent of an eternal staircase, a birds-eye view is granted of an expansive and treacherous labyrinth situated in permanent twilight. Spite-tainted drachnids, spiders, Teir`Dal, and a haunted gnome-like people named the Teir`Haeth patrol and guard the various prison cells dotted throughout the endless halls. The prisoners aren't here for justice, as the Tribunal may dole out, but for the amusement of the mistress of this demiplanar realm. Such amusement has been dragged in the form of the high-profile prisoner now raised high above the center of the labyrinth, hoisted in a private cell. Whoever it is has been getting special attention from the shadows. Should they be conscious enough, they will repeatedly see the futility of the adventurers daring to come to their rescue. For any prisoners who do manage to escape the grasp of their captors, they may not be all there, or all they had come to this realm as, roaming as zombie-like or semi-lucid husks. Some may even trip their way to the lower levels, to be lost in the secondary labyrinth of sewers. |
BACK TO TOP OF CATEGORY BACK TO TOP OF PAGE
--------------------------------------------------------------------
Recognitions and credits for all involved with developing and creating EverQuest, for the current and past expansions, can be seen by clicking the 'Credits' button at the bottom of the Server Select Screen and then viewing the 'Current Expansion' or the 'Previous Expansions' tab.
They can also be found in your EverQuest Directory (credits_current.txt & credits_previous.txt).
A huge thank you to all involved!
.
If you note any errors, misspellings, item name errors, misinformation or anything that needs addressing on this page -- PLEASE let me know via an in-game EQ Message (Bonzz on the Bertoxxulous server), or post on Bonzz's Discord Server!
This Page Last Updated October 7, 2026.
This fan site is created and provided free (uncompensated, no ads, no sponsors, no registration / log-in), by Bonzz of Bertoxxulous. Images / graphics / sounds on this web site are in-game (EverQuest) captures, originate from Sony / Darkpaw / Daybreak Games (EverQuest) and / or with permission from others (if any). Some graphics may be modified (re-sized, cropped, etc.) from their original form. Any pages that play sounds / music, are intentionally set at low volume. Most of them are under two (2) minutes or less, and should play once and then stop. If any sound / music continues to loop (play over and over), let me know! EverQuest is copyright / trademark / owned / operated by Darkpaw Games, which is owned / operated by Daybreak Games, which is owned / operated by Enad Global 7.